Long before COVID-19 had forced millions of people to stay at home and work remotely, many companies already had team members that telecommuted or connected remotely to company resources while away on business travel. In general, VPNs and cloud applications have become commonly used tools by all of us, as they allow remote employees convenient access to much-needed company data.
From a security standpoint, a VPN will ensure the encryption of the traffic to the network, (and even include two-factor authentication), but it will not be able to provide information regarding the security posture of the endpoint. Furthermore, a VPN will not know if a device is compliant with security standards, and is oblivious to the risks connecting devices might pose to your company network. Moreover, VPNs do not provide a way to block the device from connecting to the VPN based on its security posture. Thus, they do not offer a means for proper secure remote access.
Typically, there isn’t a built-in system monitoring the endpoint while it is connecting to the VPN. As we previously discussed, you need to layer a secure remote access solution on top of your corporate VPN so that at any given moment, endpoints can be denied access should their risk levels pass a pre-determined threshold.
Layering Portnox’s Secure Remote Access Over Cisco’s ASA VPN
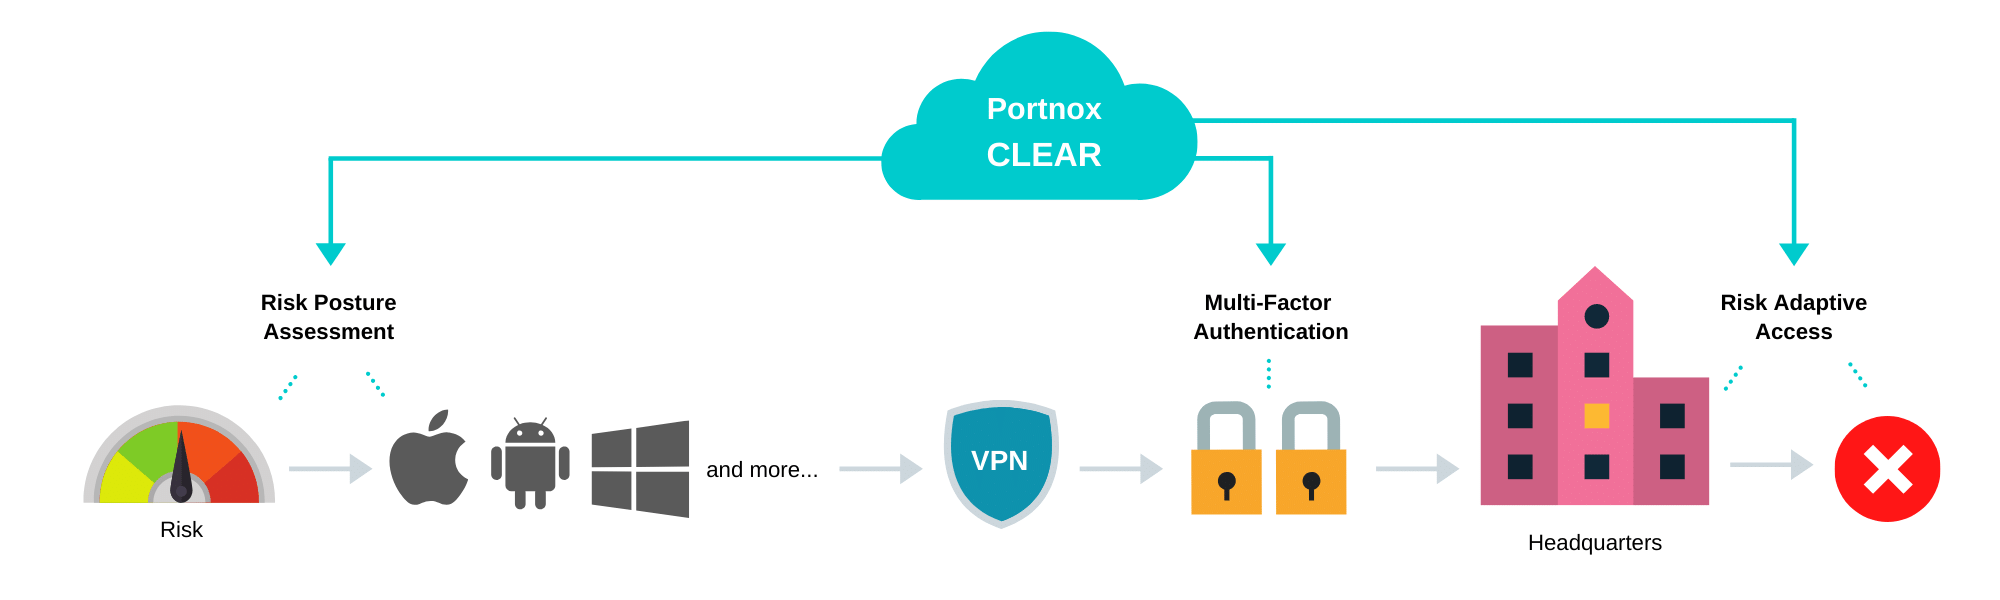
Portnox CLEAR controls secure remote access to the network by verifying user identity credentials and allowing connections for devices that have a low risk-assessment score. It continuously monitors the “health” state of both corporate and personal (BYOD) devices as they attempt to connect to the network and for as long as they remain connected. It also includes the option of enabling two-factor authentication for VPN connections.
Let’s take a look at the steps required to configure your VPN security by using CLEAR to enable secure and trusted cloud-based RADIUS access with OTP, Push-To-Access or AgentP.
Preliminary Actions
Before configuring VPN authentication for secure remote access, you need to do the following:
- Verify your organization is registered on Portnox CLEAR Cloud Services (start your unlimited free account at any time or take advantage of our temporary offer of full Portnox CLEAR version free for three months).
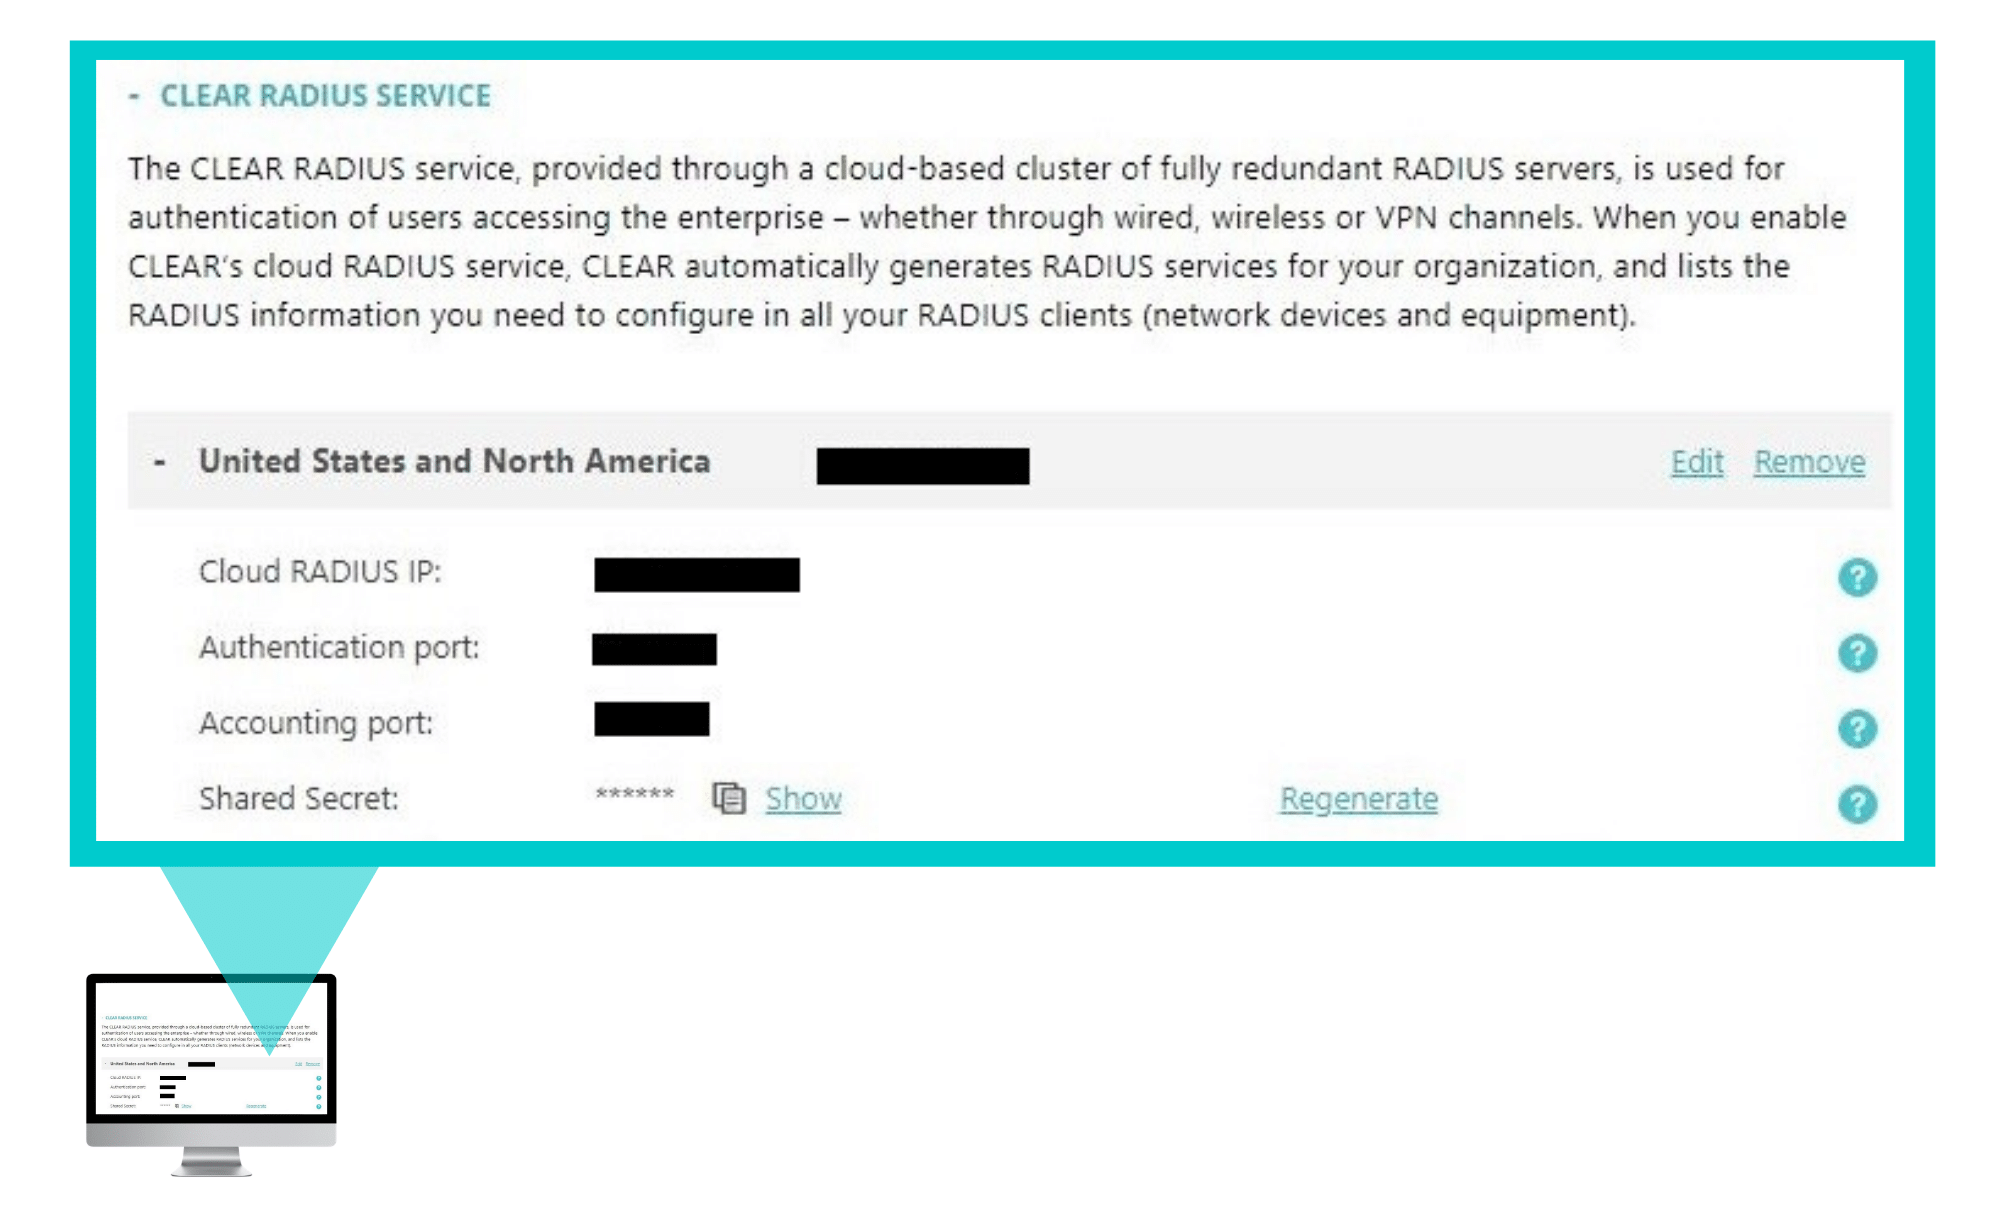
- In the CLEAR portal, go to Settings > Services and expand CLEAR RADIUS Service.
- If the Enable Cloud RADIUS checkbox is not checked, click Edit and check the Enable Cloud RADIUS checkbox.
- Note the RADIUS server details required when configuring VPN access:
-
- Cloud RADIUS IP – this is the IP address of the CLEAR RADIUS server
- Authentication port
- Accounting port
- Shared Secret – this is the RADIUS client shared secret
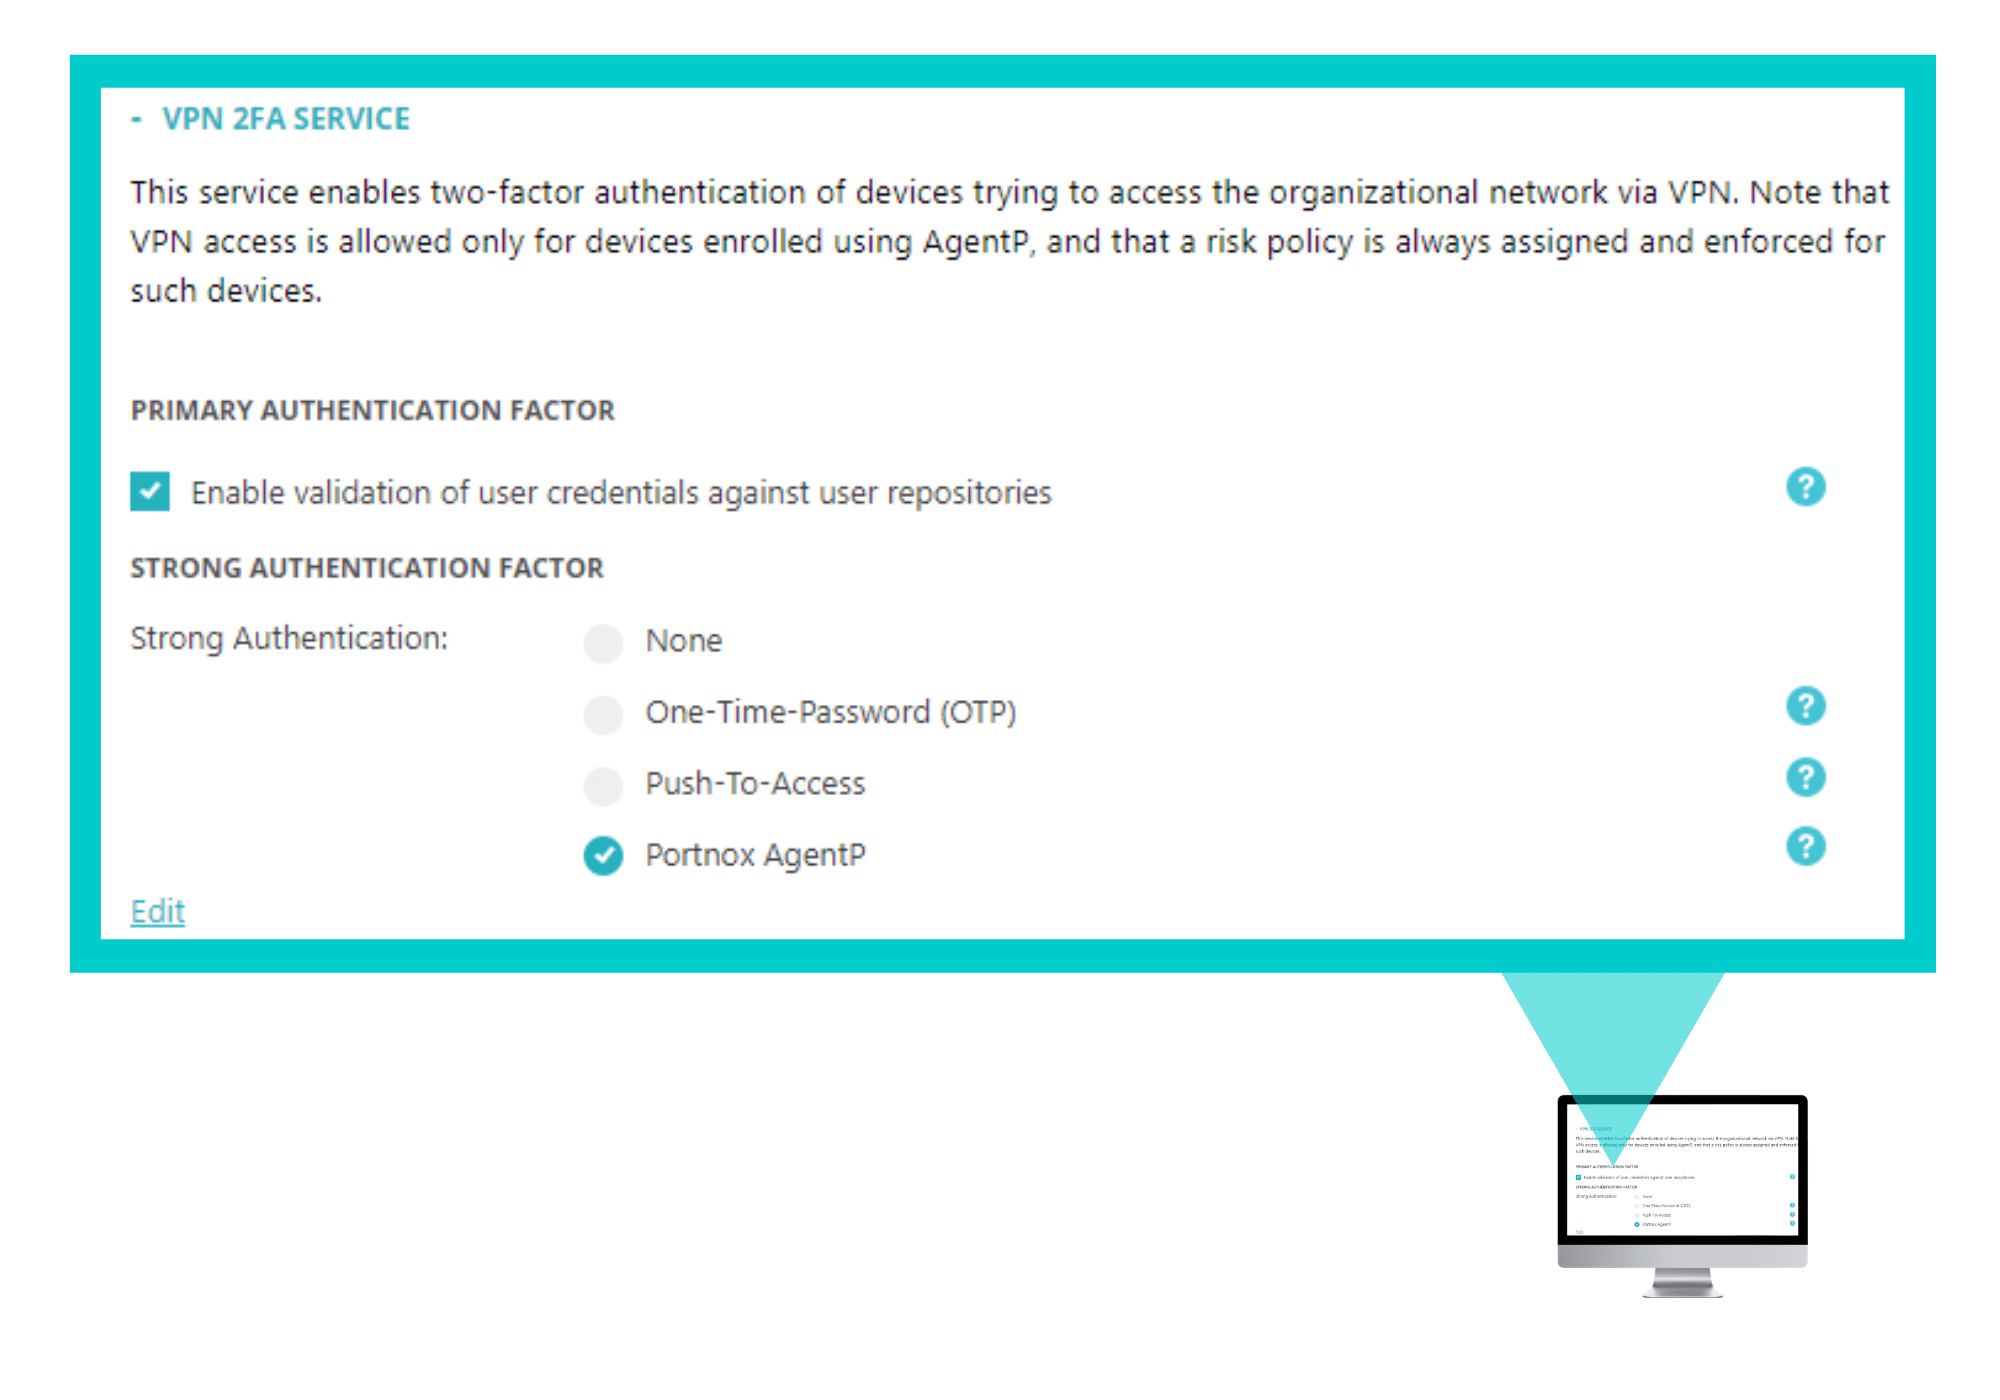
 In the CLEAR portal, go to Settings > Services and expand VPN 2FA Service. Then, under Strong Authentication Factor, make sure that either One-Time-Password (OTP), Push-To-Access or Portnox AgentP is selected. You can download AgentP from here.
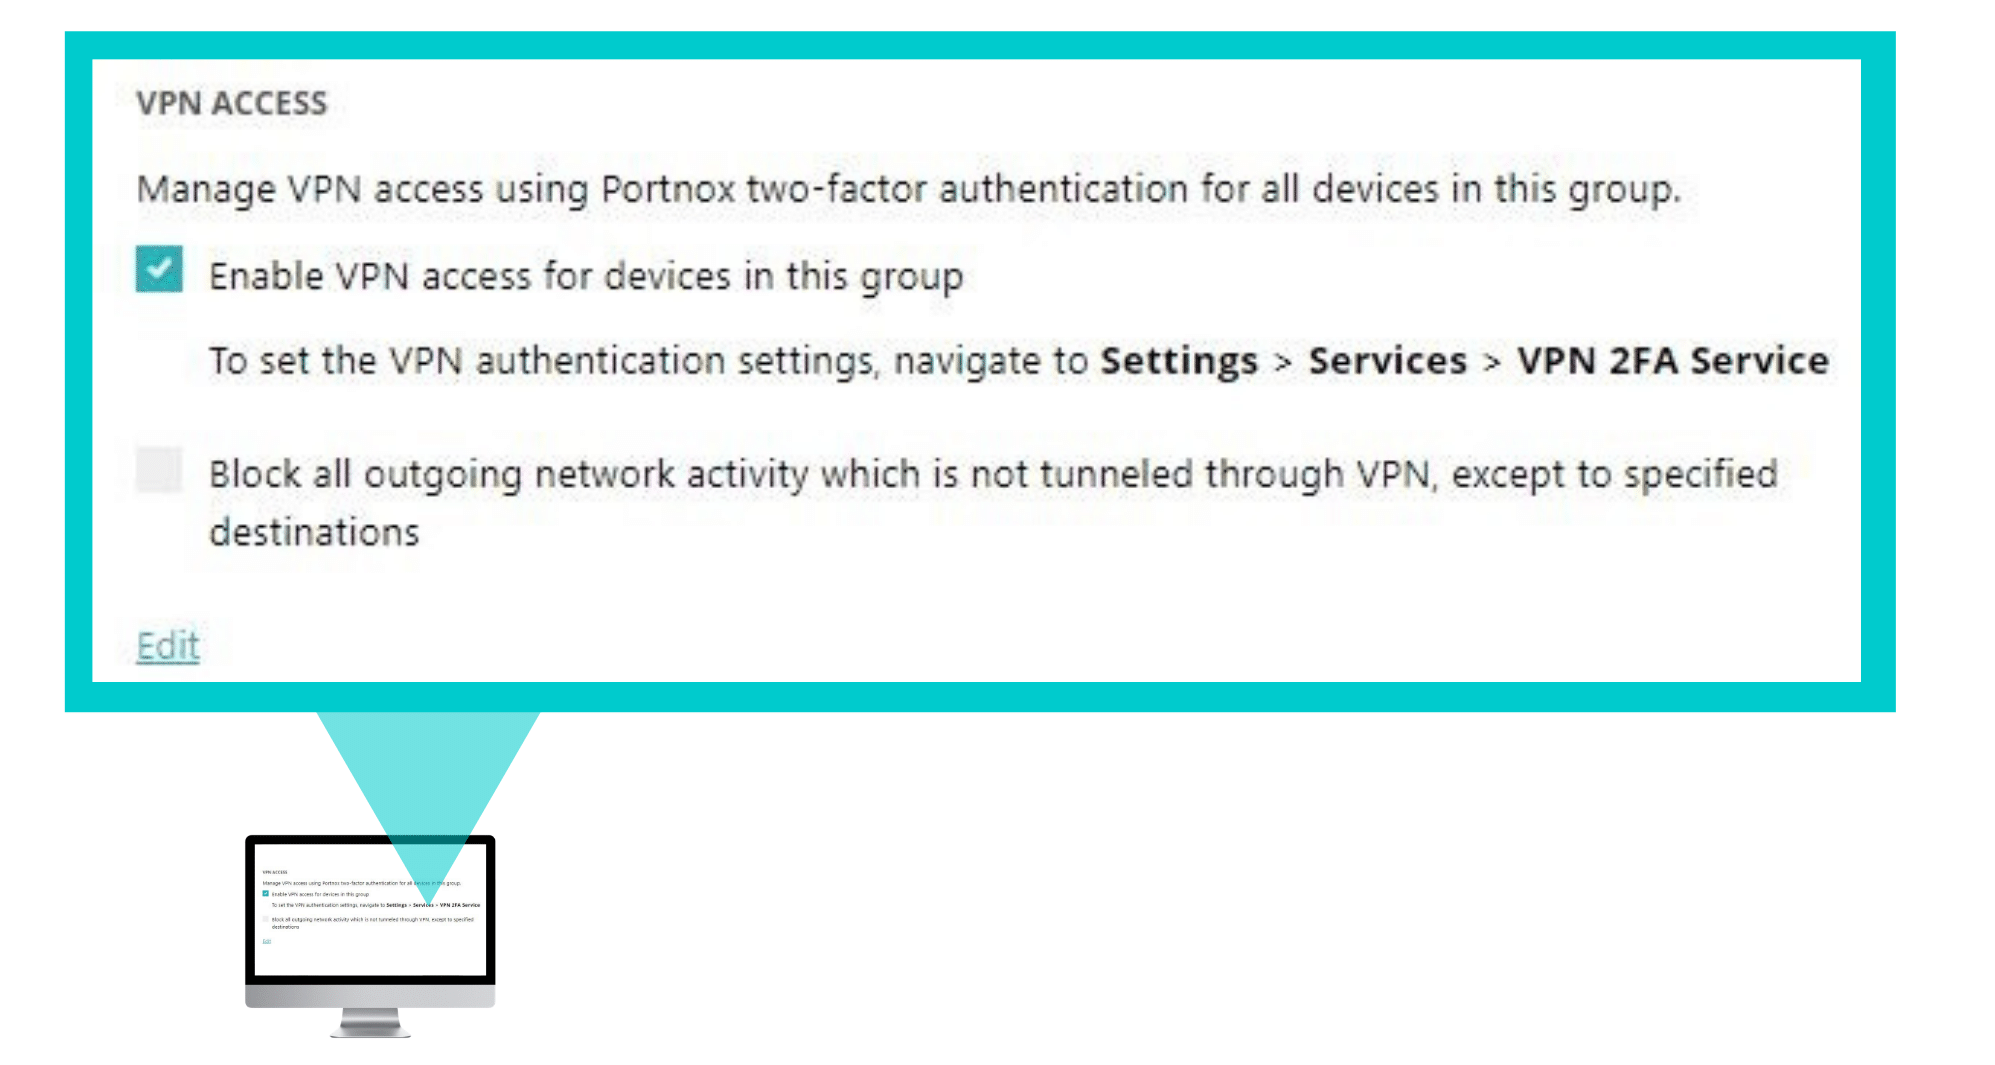
- In the CLEAR portal, go to Groups and create a group for VPN users, or record the name of an existing group. Enable VPN access.
Make sure the endpoints for which you wish to secure VPN authentication, are enrolled with AgentP.
Configuring Cisco ASA VPN for Secure Remote Access
In the following steps, we will configure the VPN authentication to be secured and protected based on RADIUS authentication and this should be performed in the Cisco ASA console.
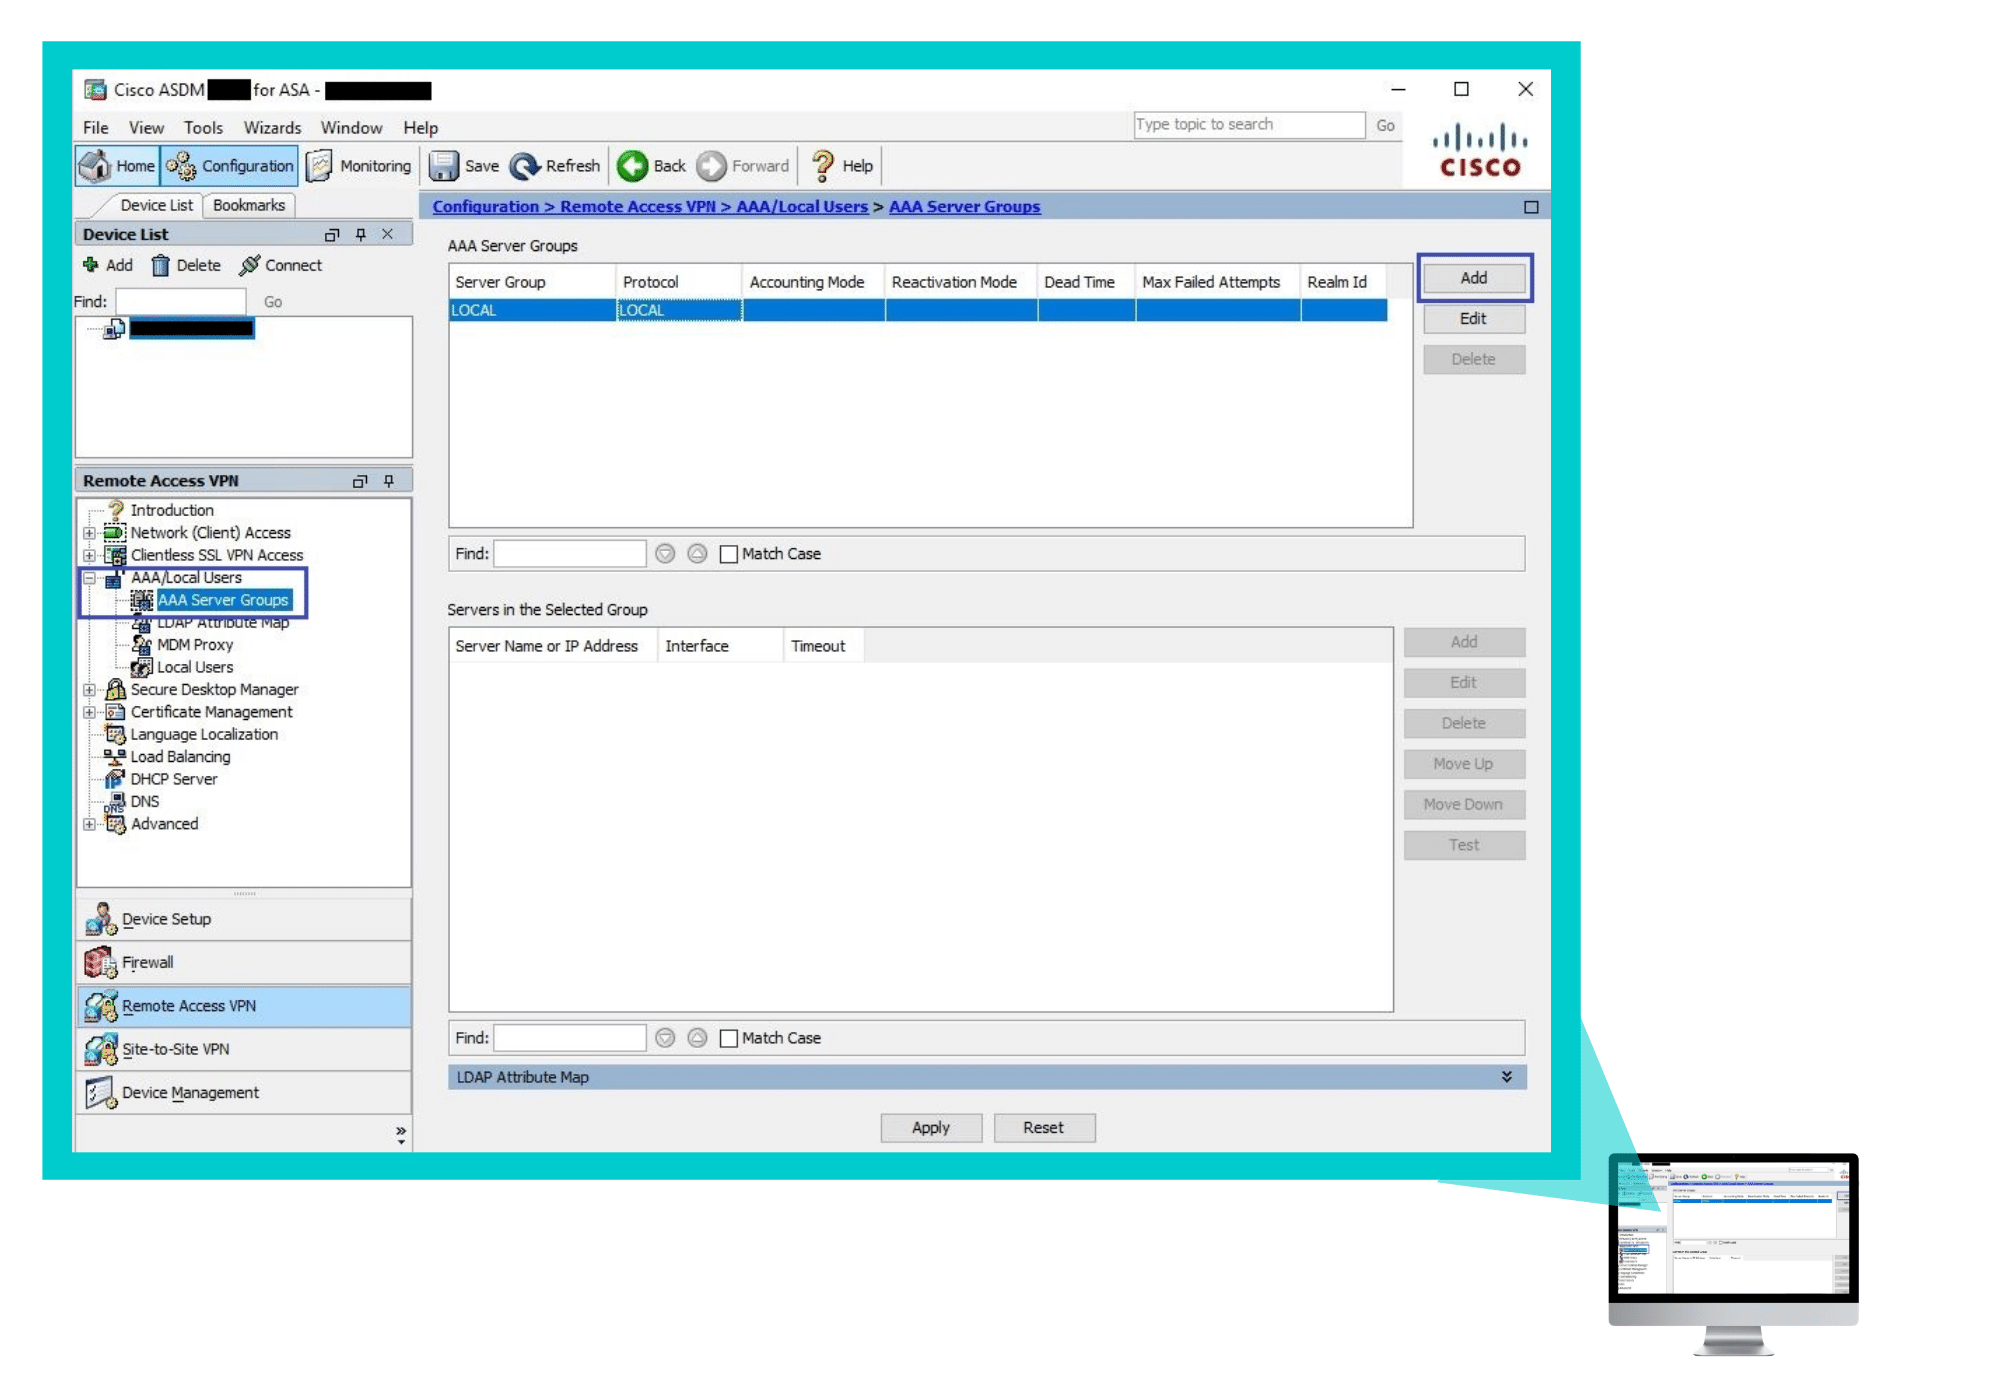
Step 1 – Creating a RADIUS Authentication Server
Create a RADIUS server group by navigating to Configuration > Remote Access VPN > AAA/Local Users > AAA Server Groups and clicking Add.
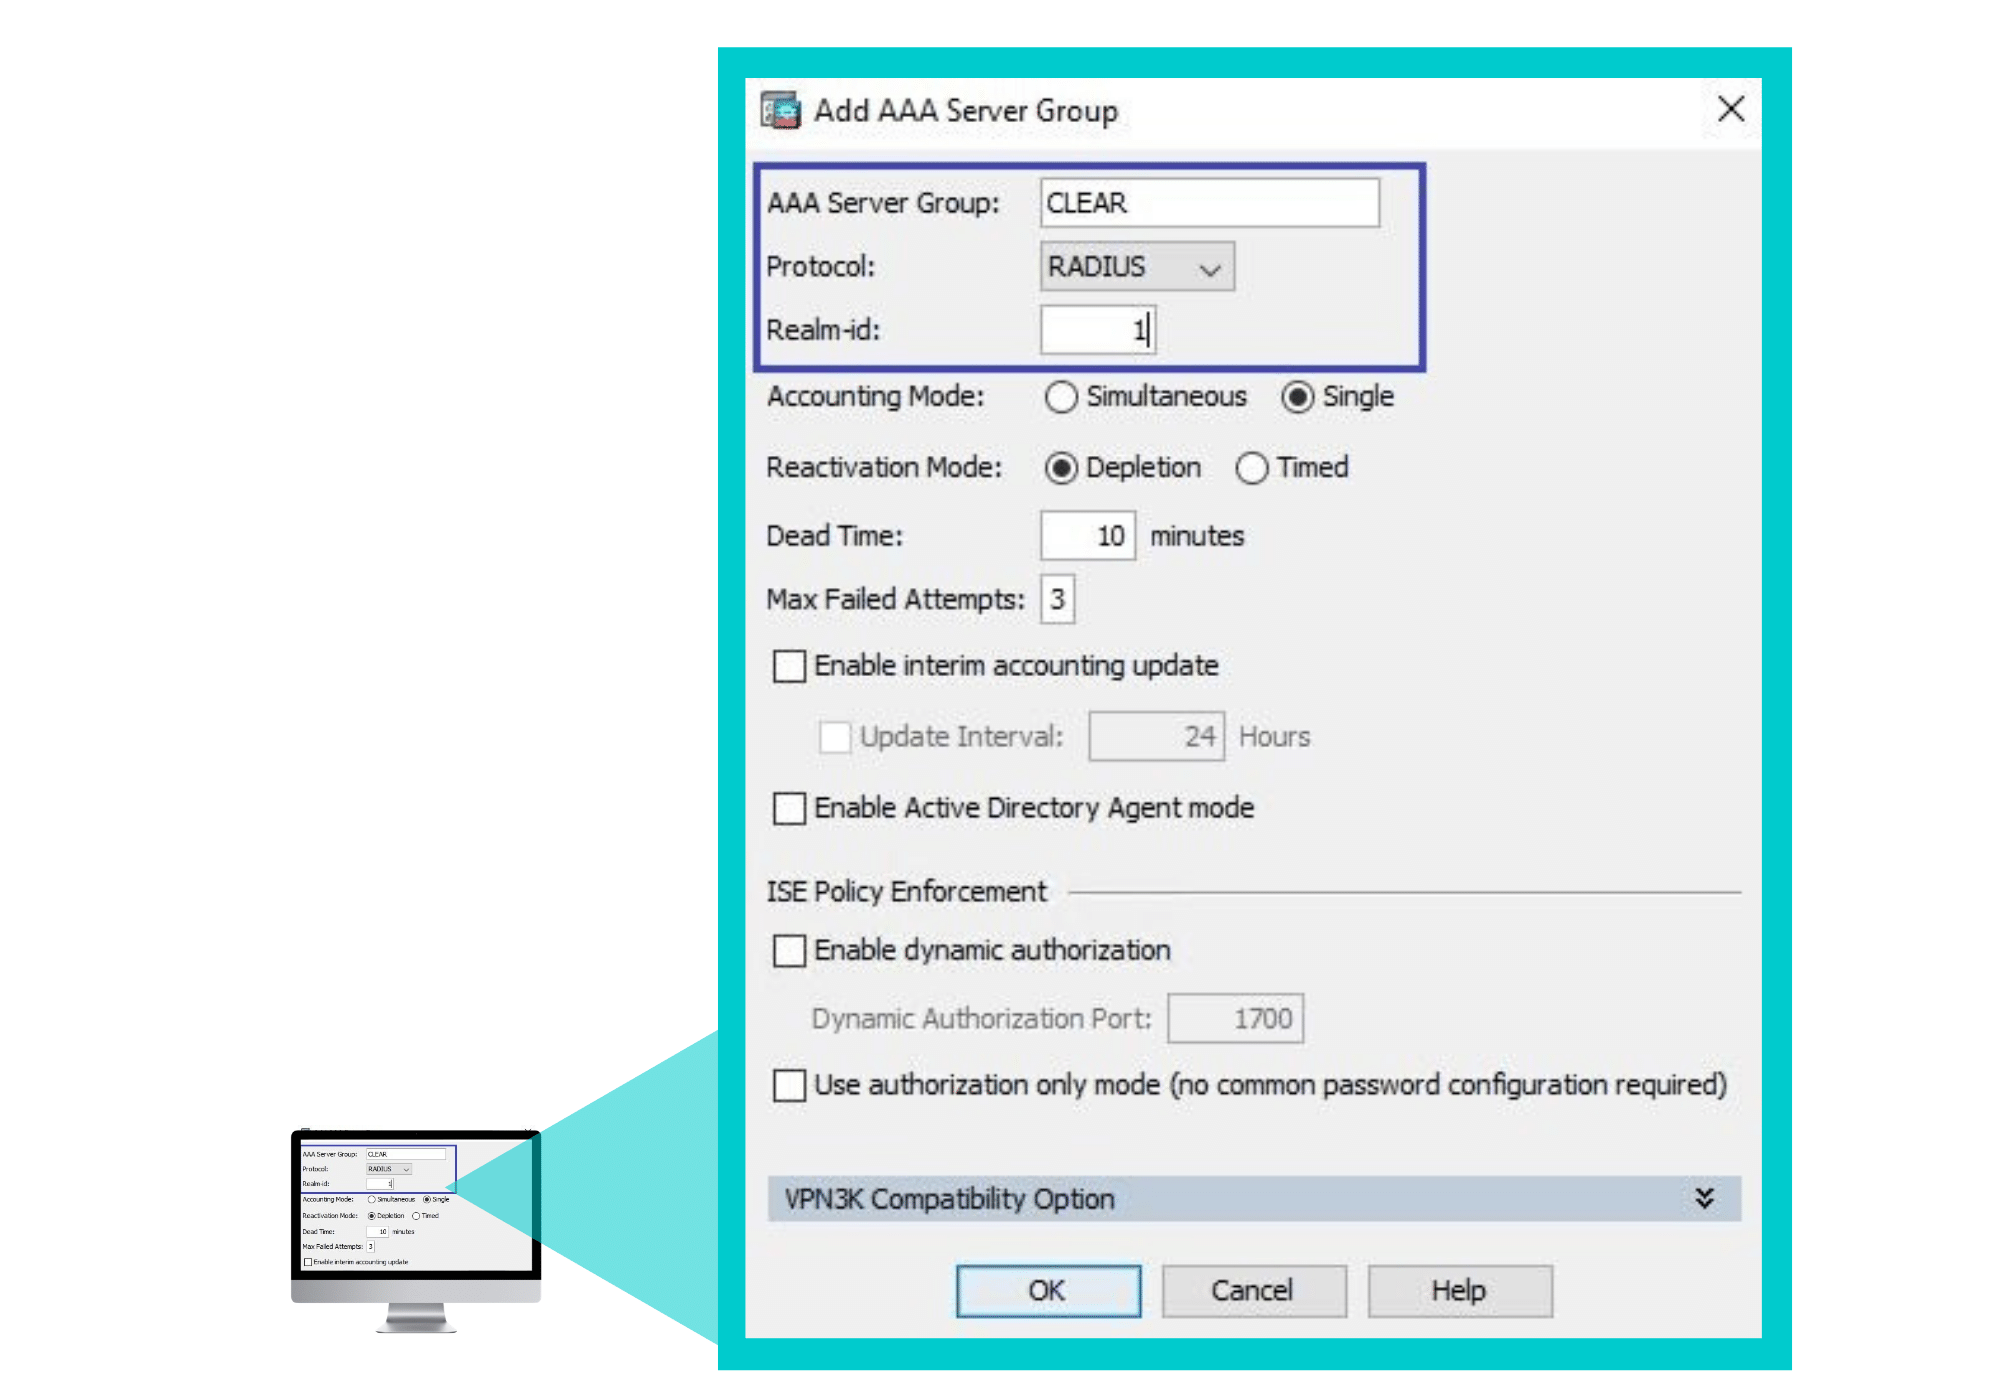
 In the Add AAA Server Group window that appears:
-
- Specify a name for the AAA Server Group.
- In Protocol select RADIUS.
- Enter a Realm-id.
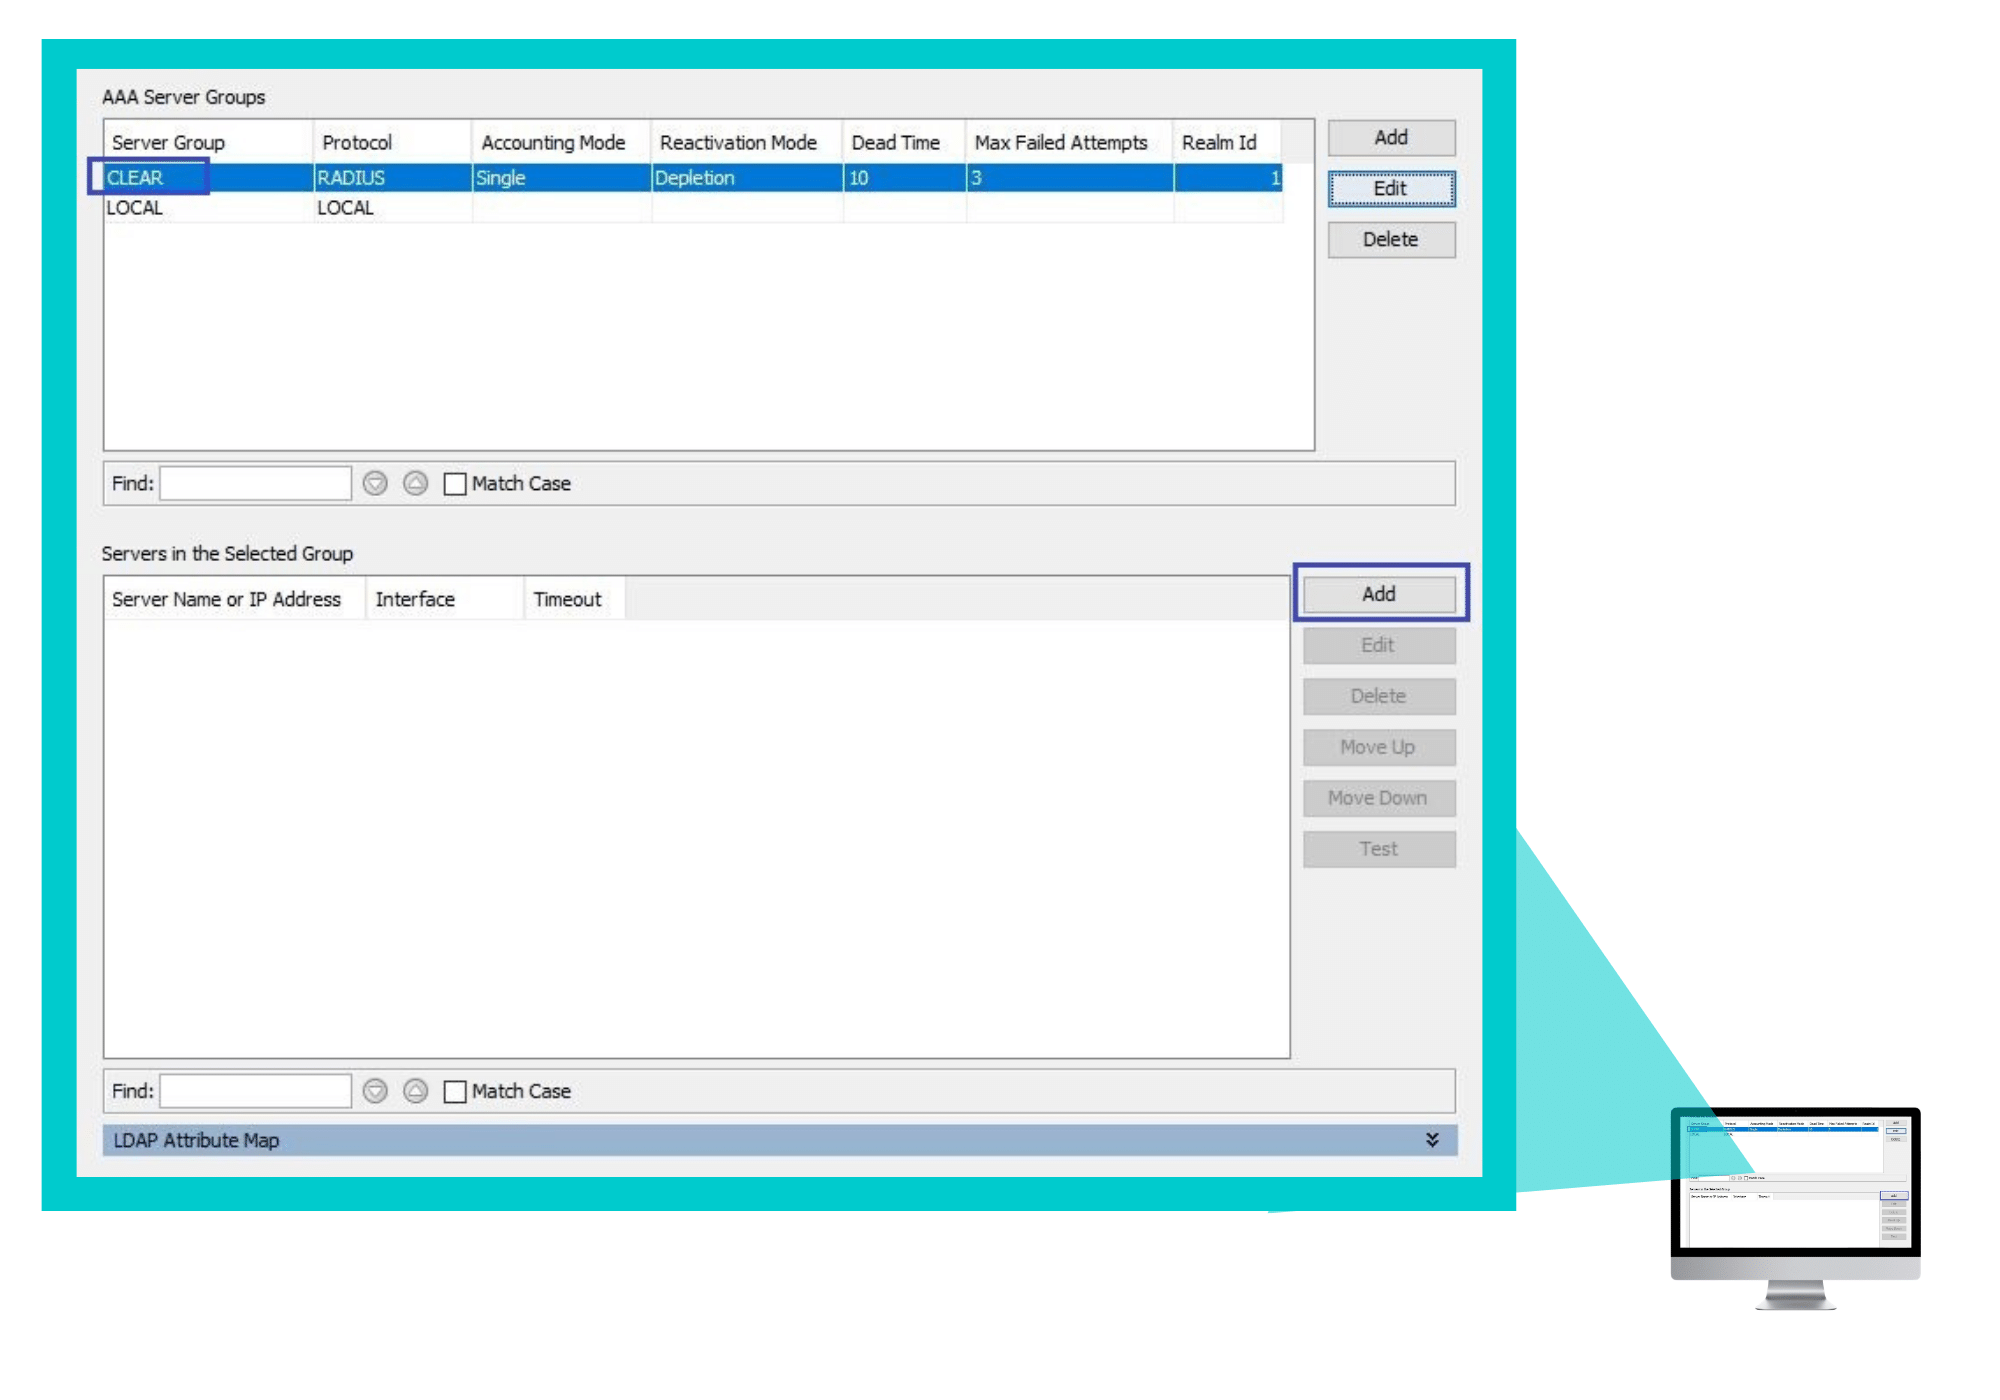
Select the AAA Server Group you created, and in the Servers in the Selected Group section, click Add.
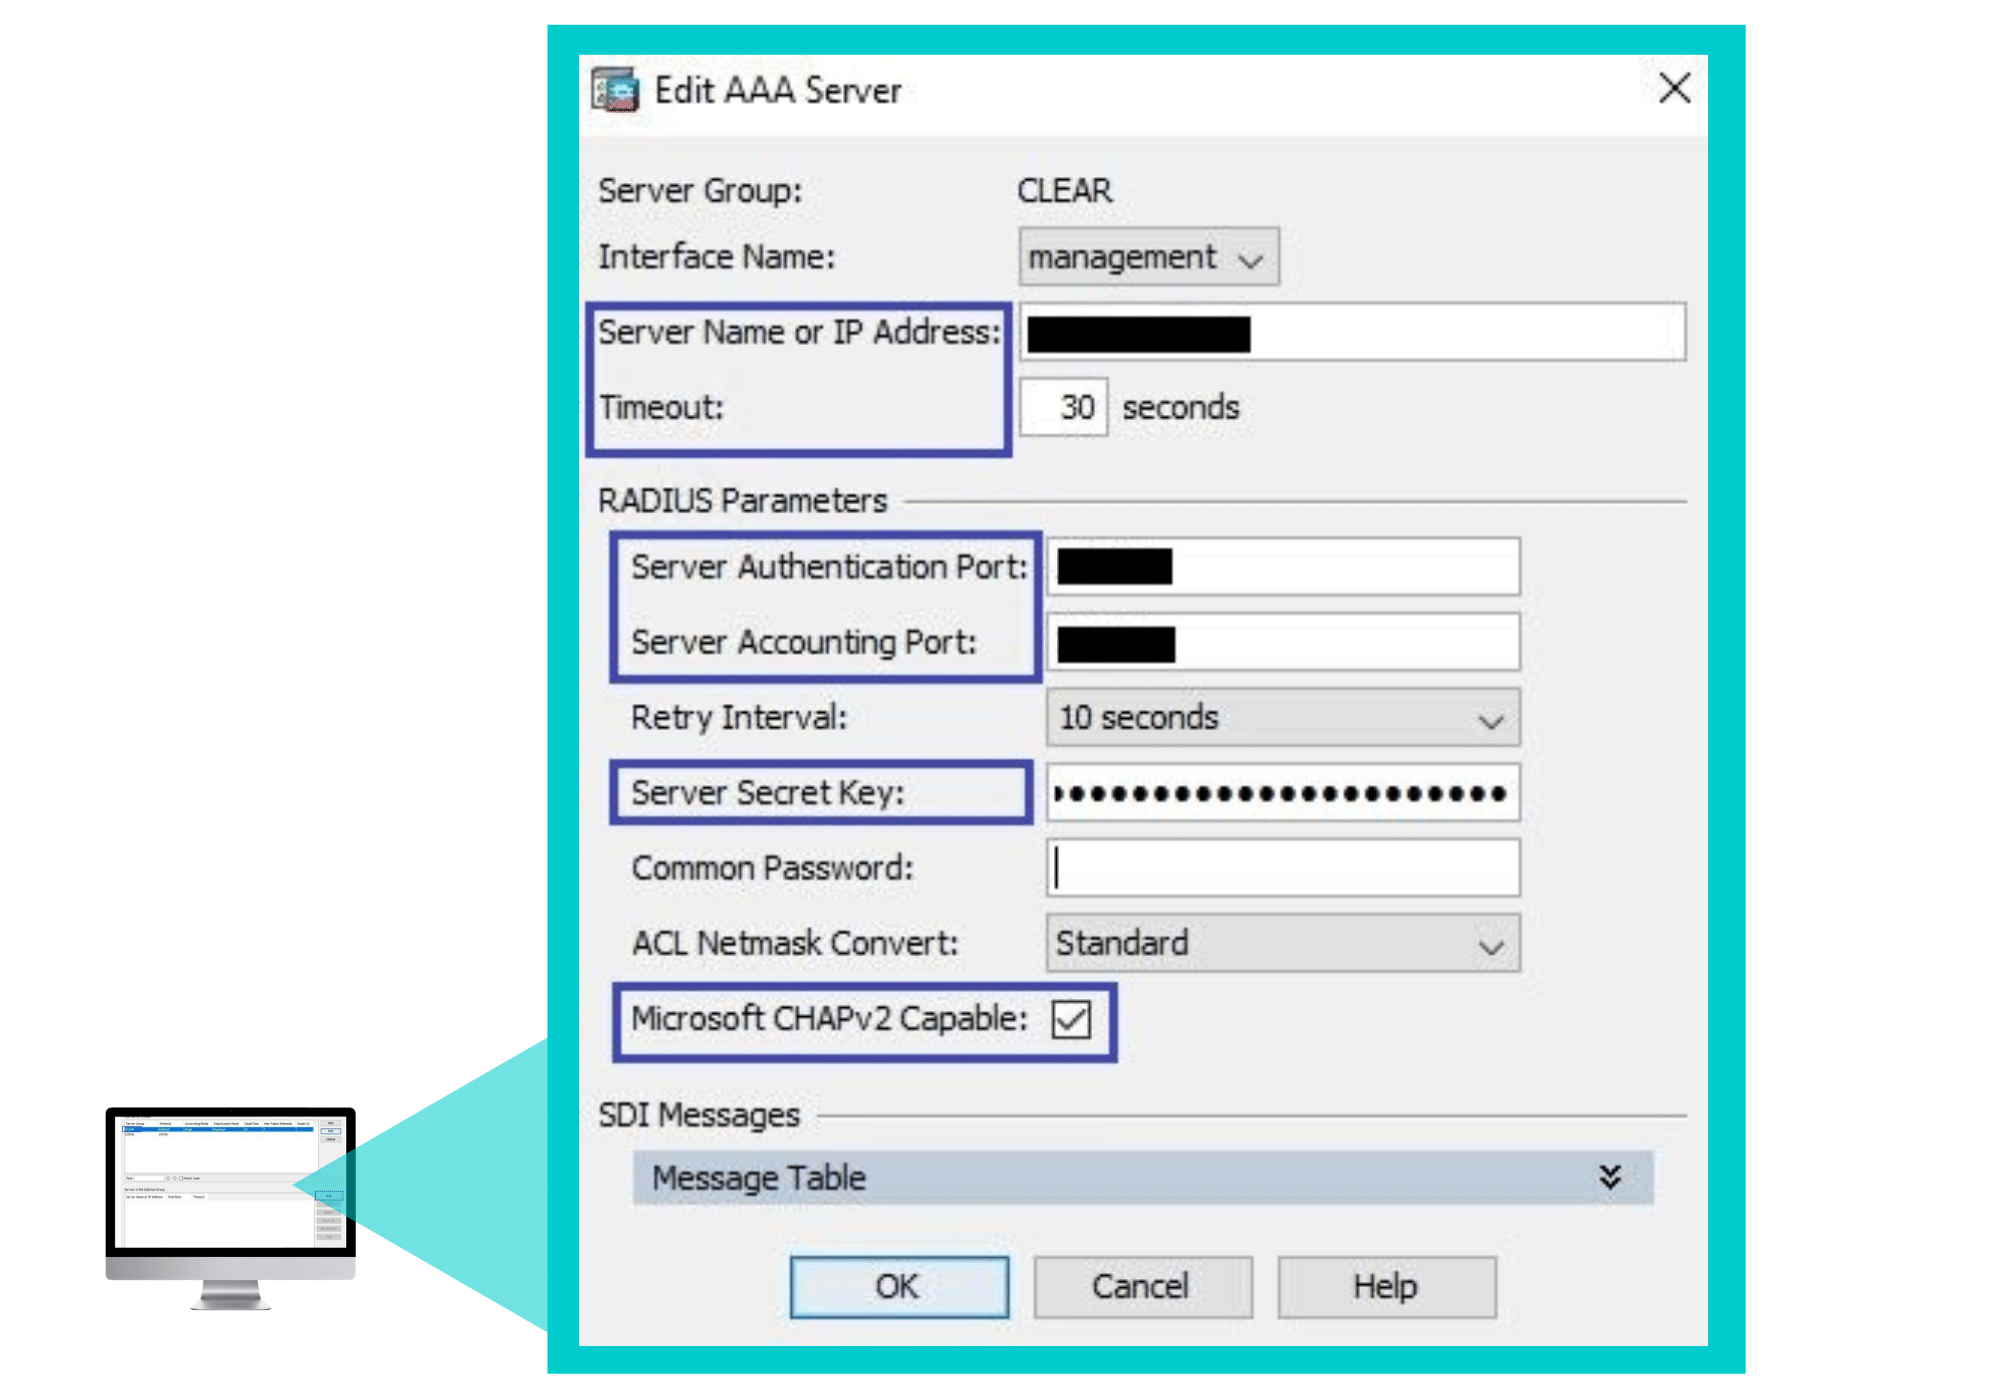
 In the Edit AAA Server window that appears:
- Enter the following CLEAR RADIUS server details, which you noted in Preliminary Actions, step 4:
-
- In Server Name or IP Address, enter the Cloud RADIUS IP.
- In Server Authentication port, enter the Authentication port.
- In Server Accounting port, enter the Accounting port.
- In Server Secret Key, enter the Shared Secret.
- Update the Timeout to 30 seconds.
- Verify that the Microsoft CHAPv2 Capable checkbox is checked.
- Click OK.
 Step 2 – Configuring the VPN Connection Profile
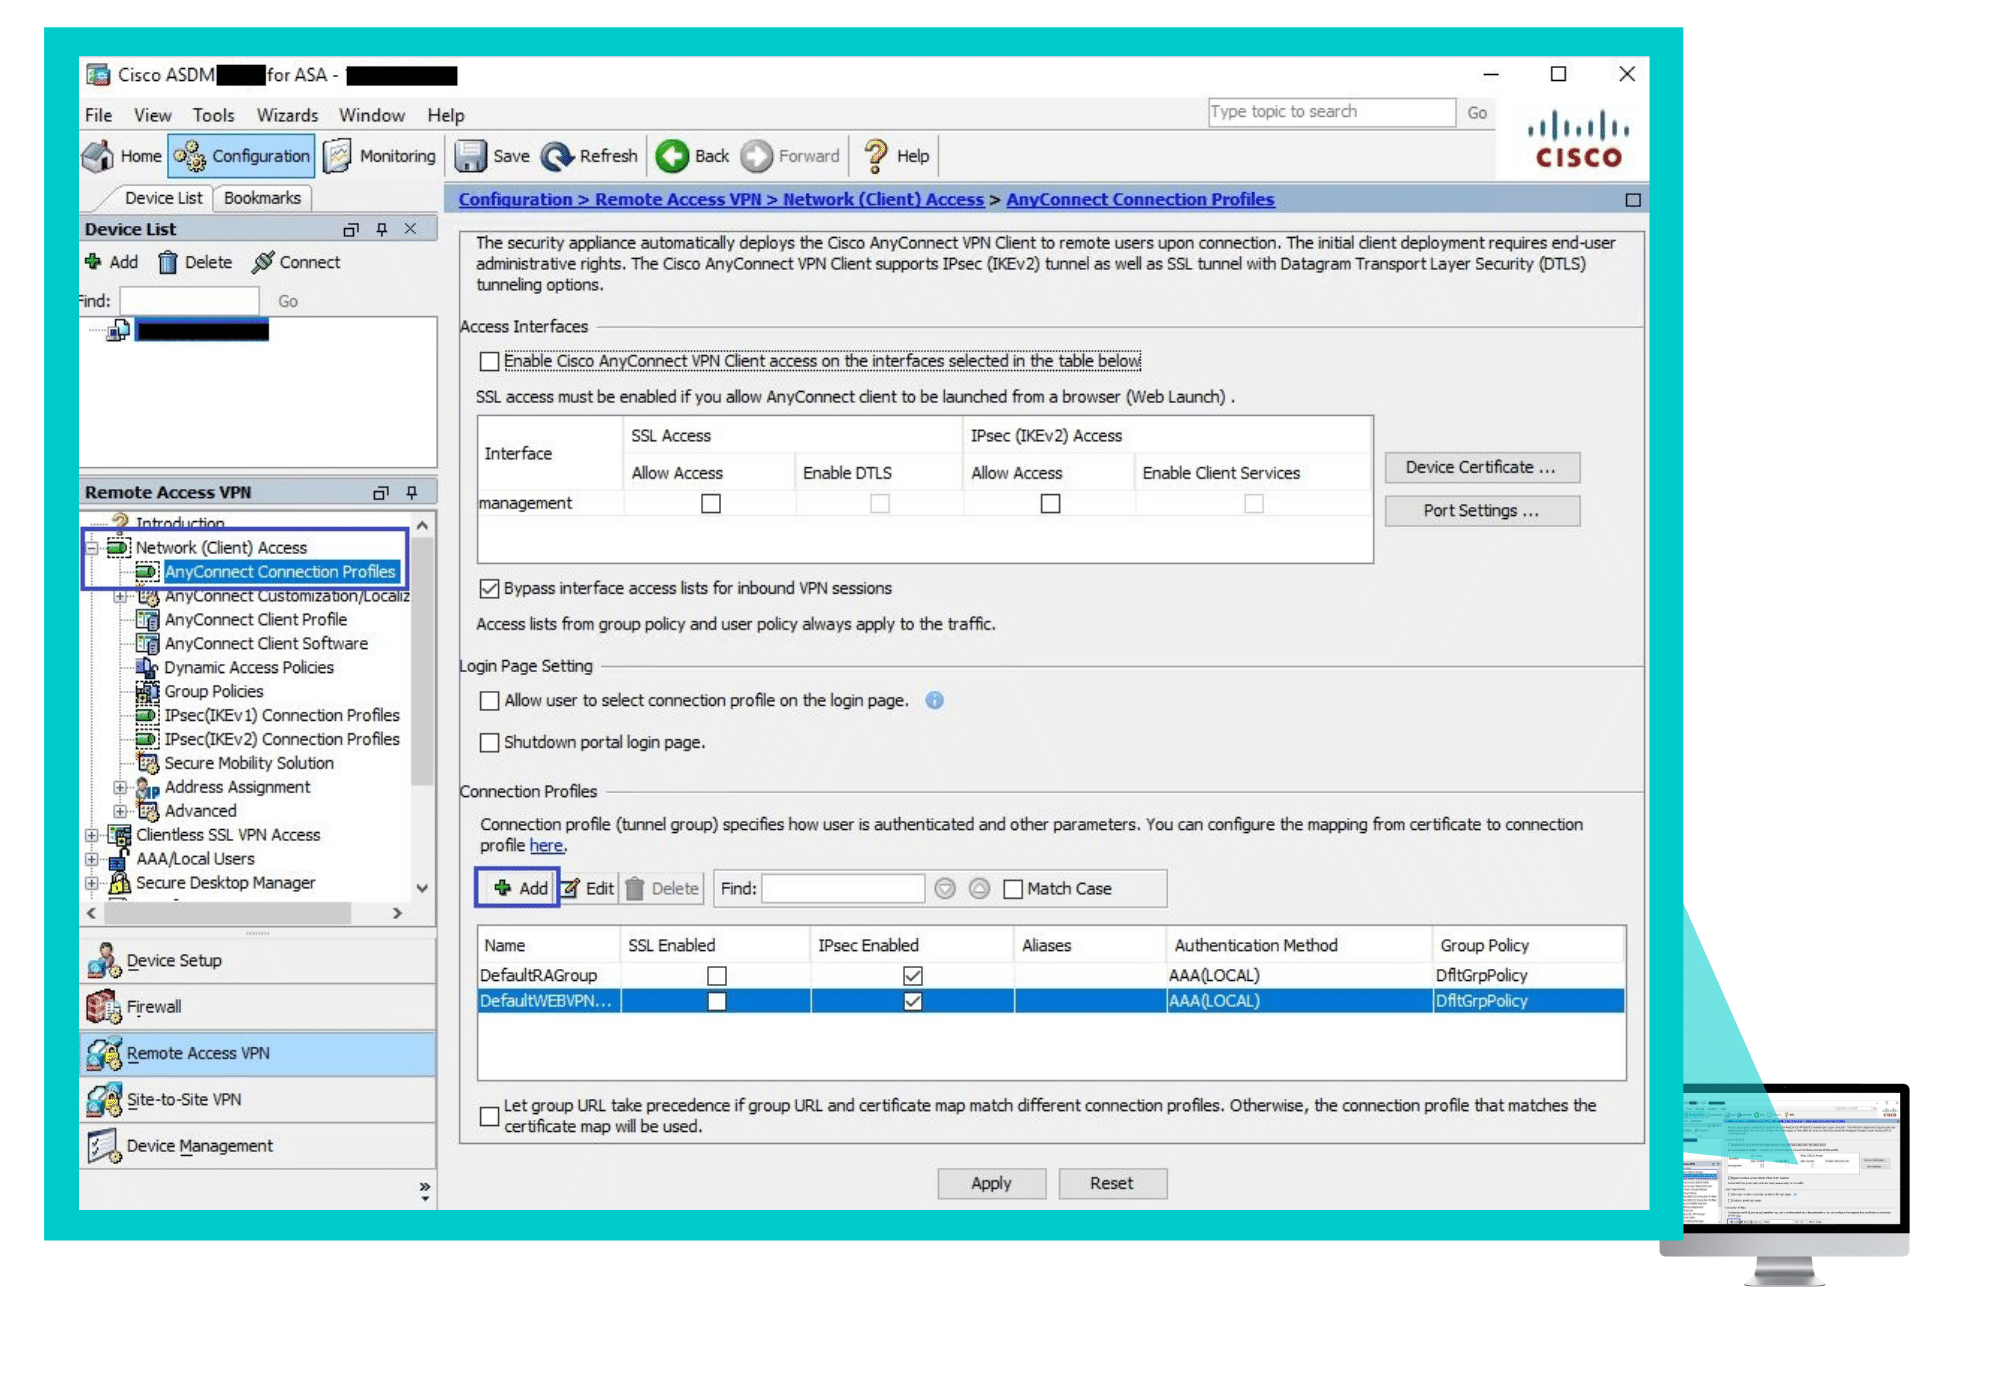
Navigate to Configuration > Remote Access VPN > Network (Client) Access > AnyConnect Connection Profiles, and in the Connection Profiles section click Add.
 In the Edit AnyConnect Connection Profile window that appears – In the Basic tab:
-
- Specify a Name for the connection profile.
- Specify Aliases for the connection profile.
- Select the AAA server group (created in Step 1).
- Select Client Address Pools.
- Check the Enable SSL VPN client protocol checkbox.
- Specify DNS servers.
- Specify Domain Name.

In the Advanced tab:
Check the Enable password management checkbox.
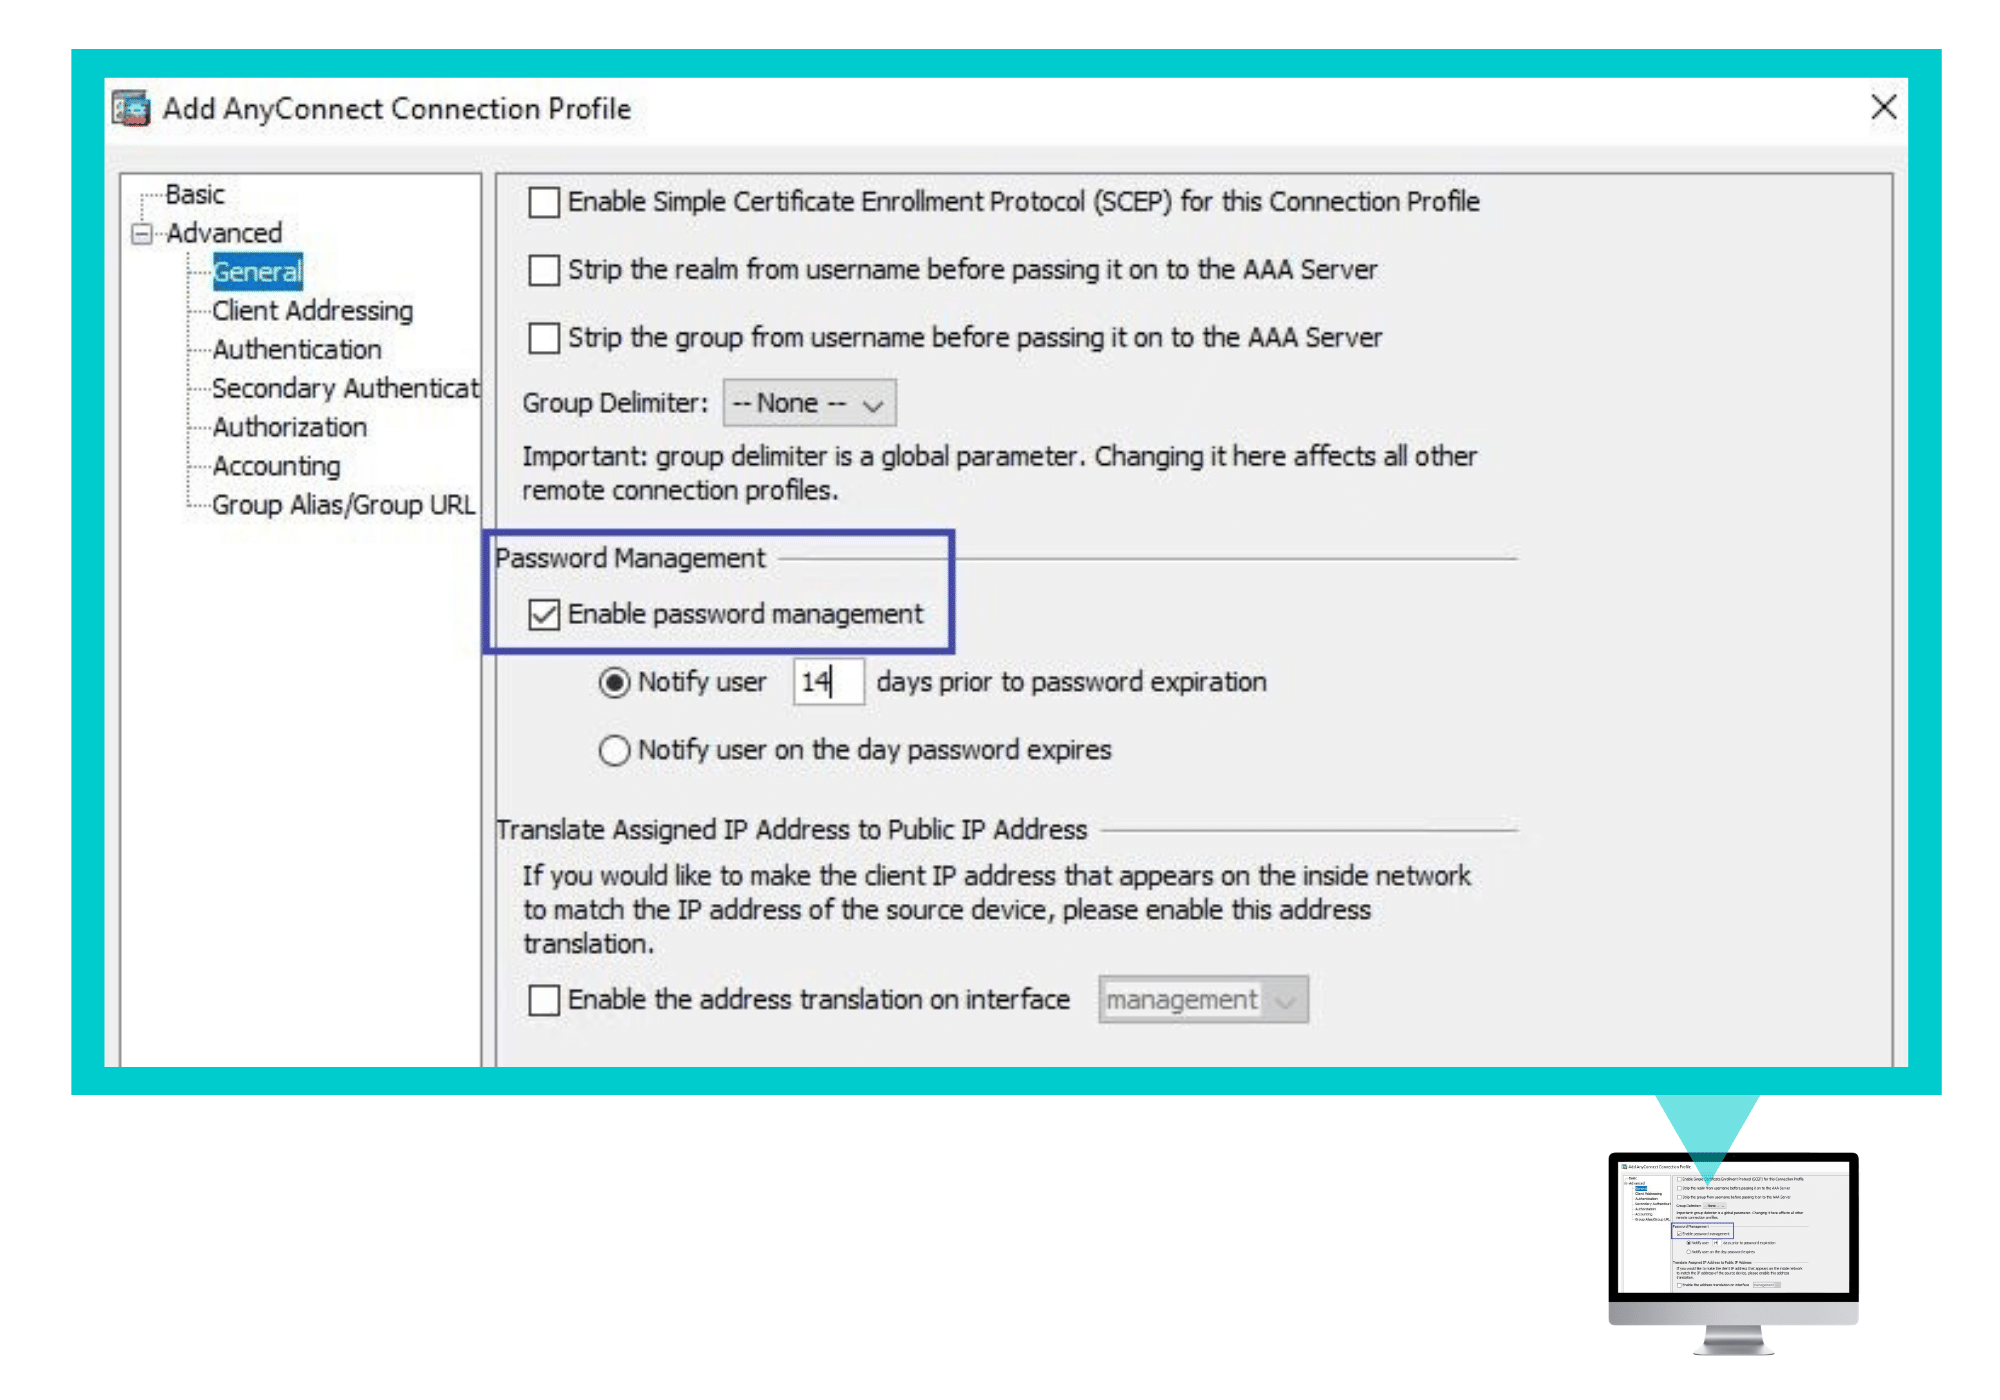 Click Apply.
Instructions for Providing VPN Credentials
The VPN 2FA method you selected (see Step 5 in Preliminary Actions) determines what the users need to provide to connect securely via VPN.
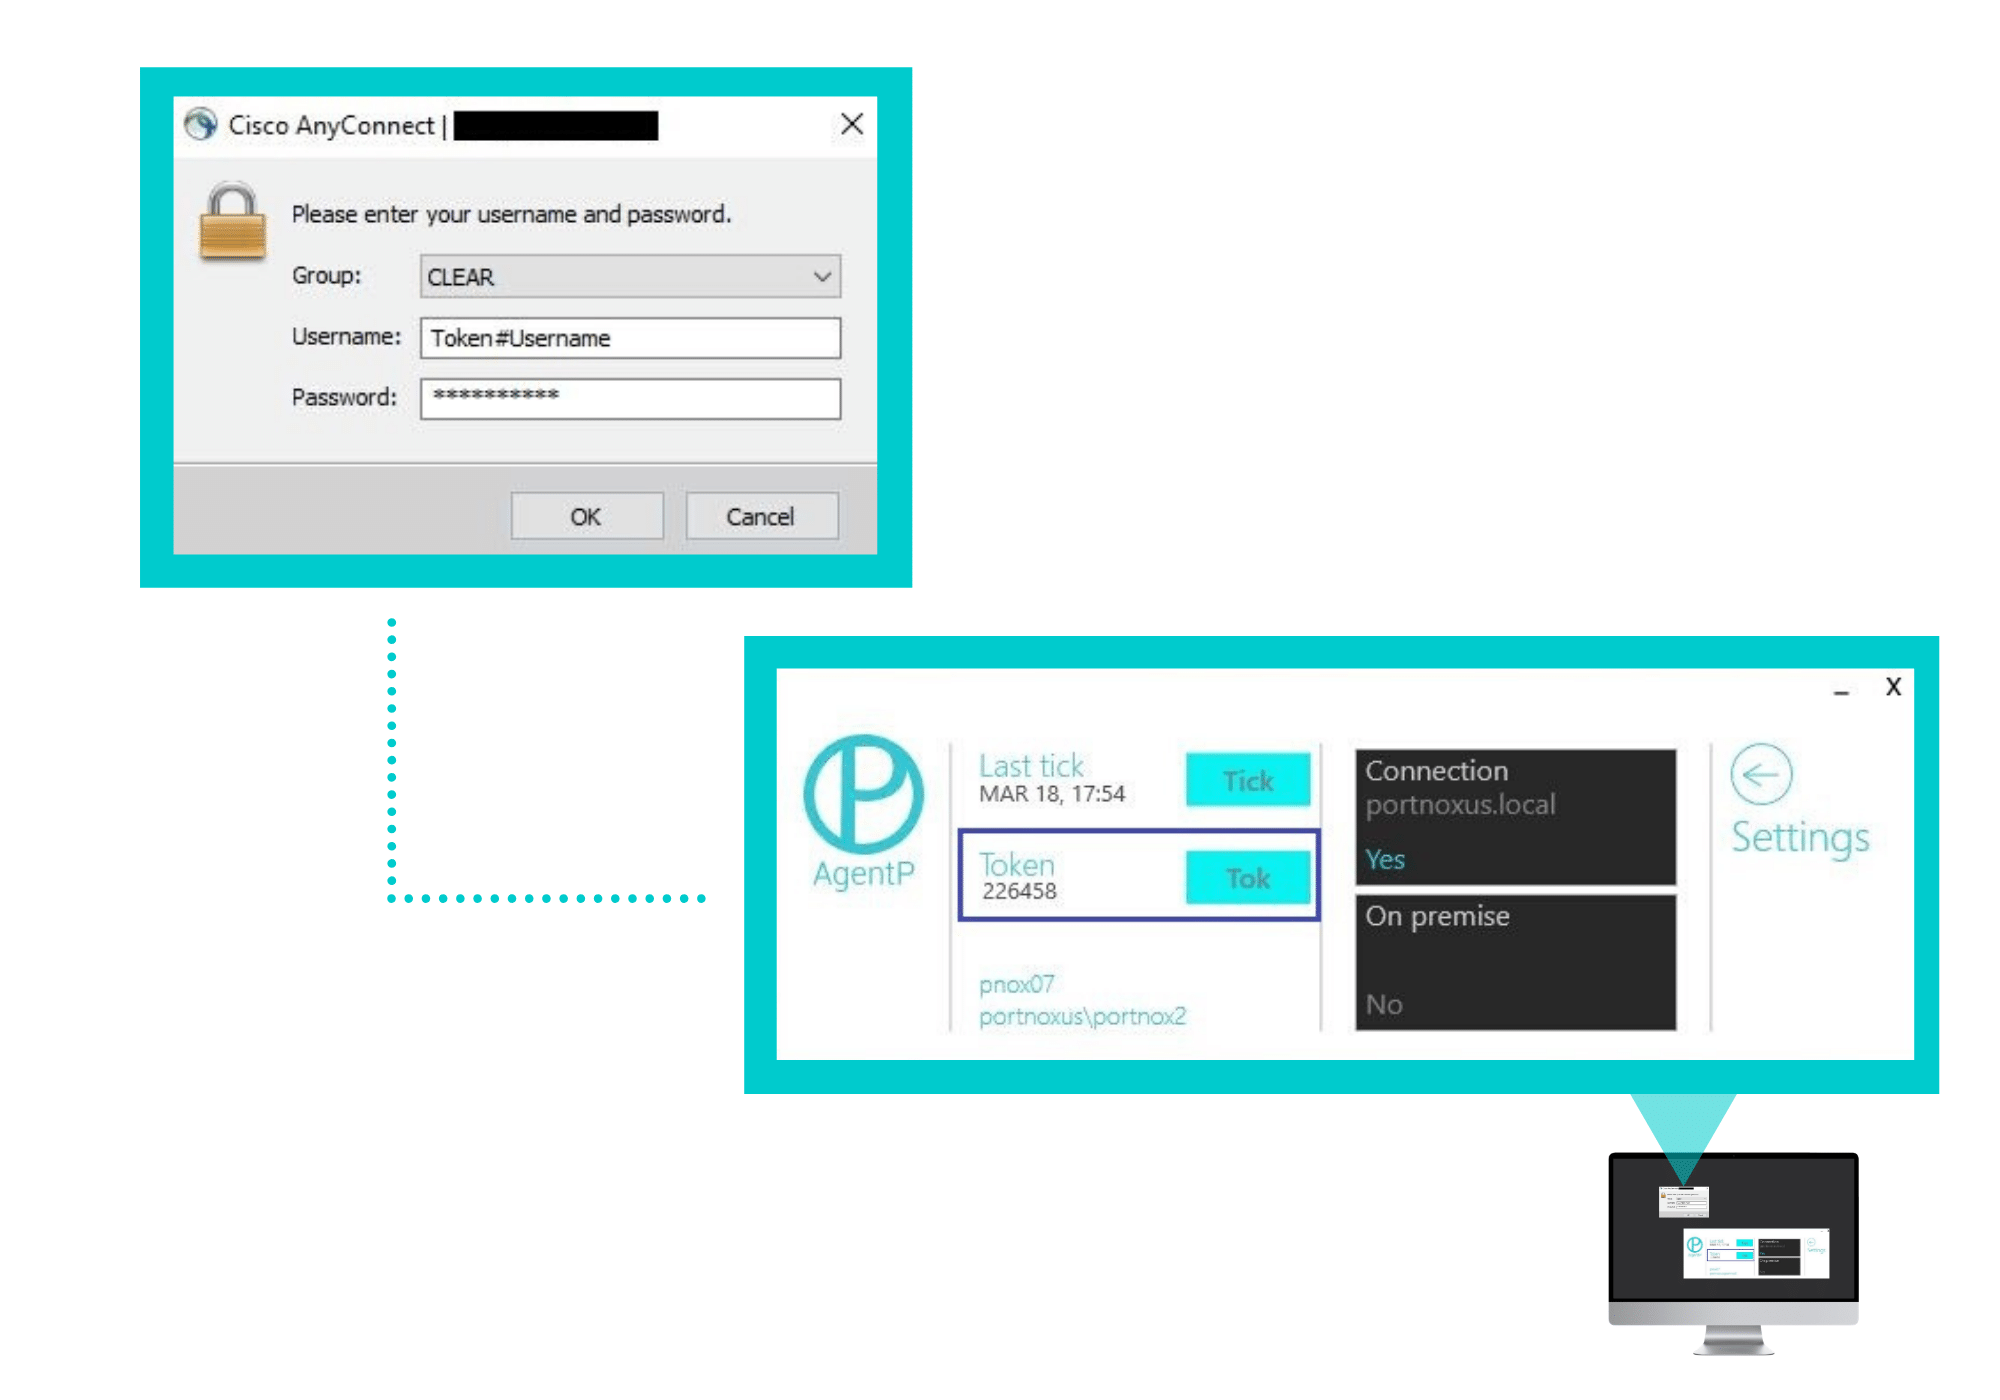
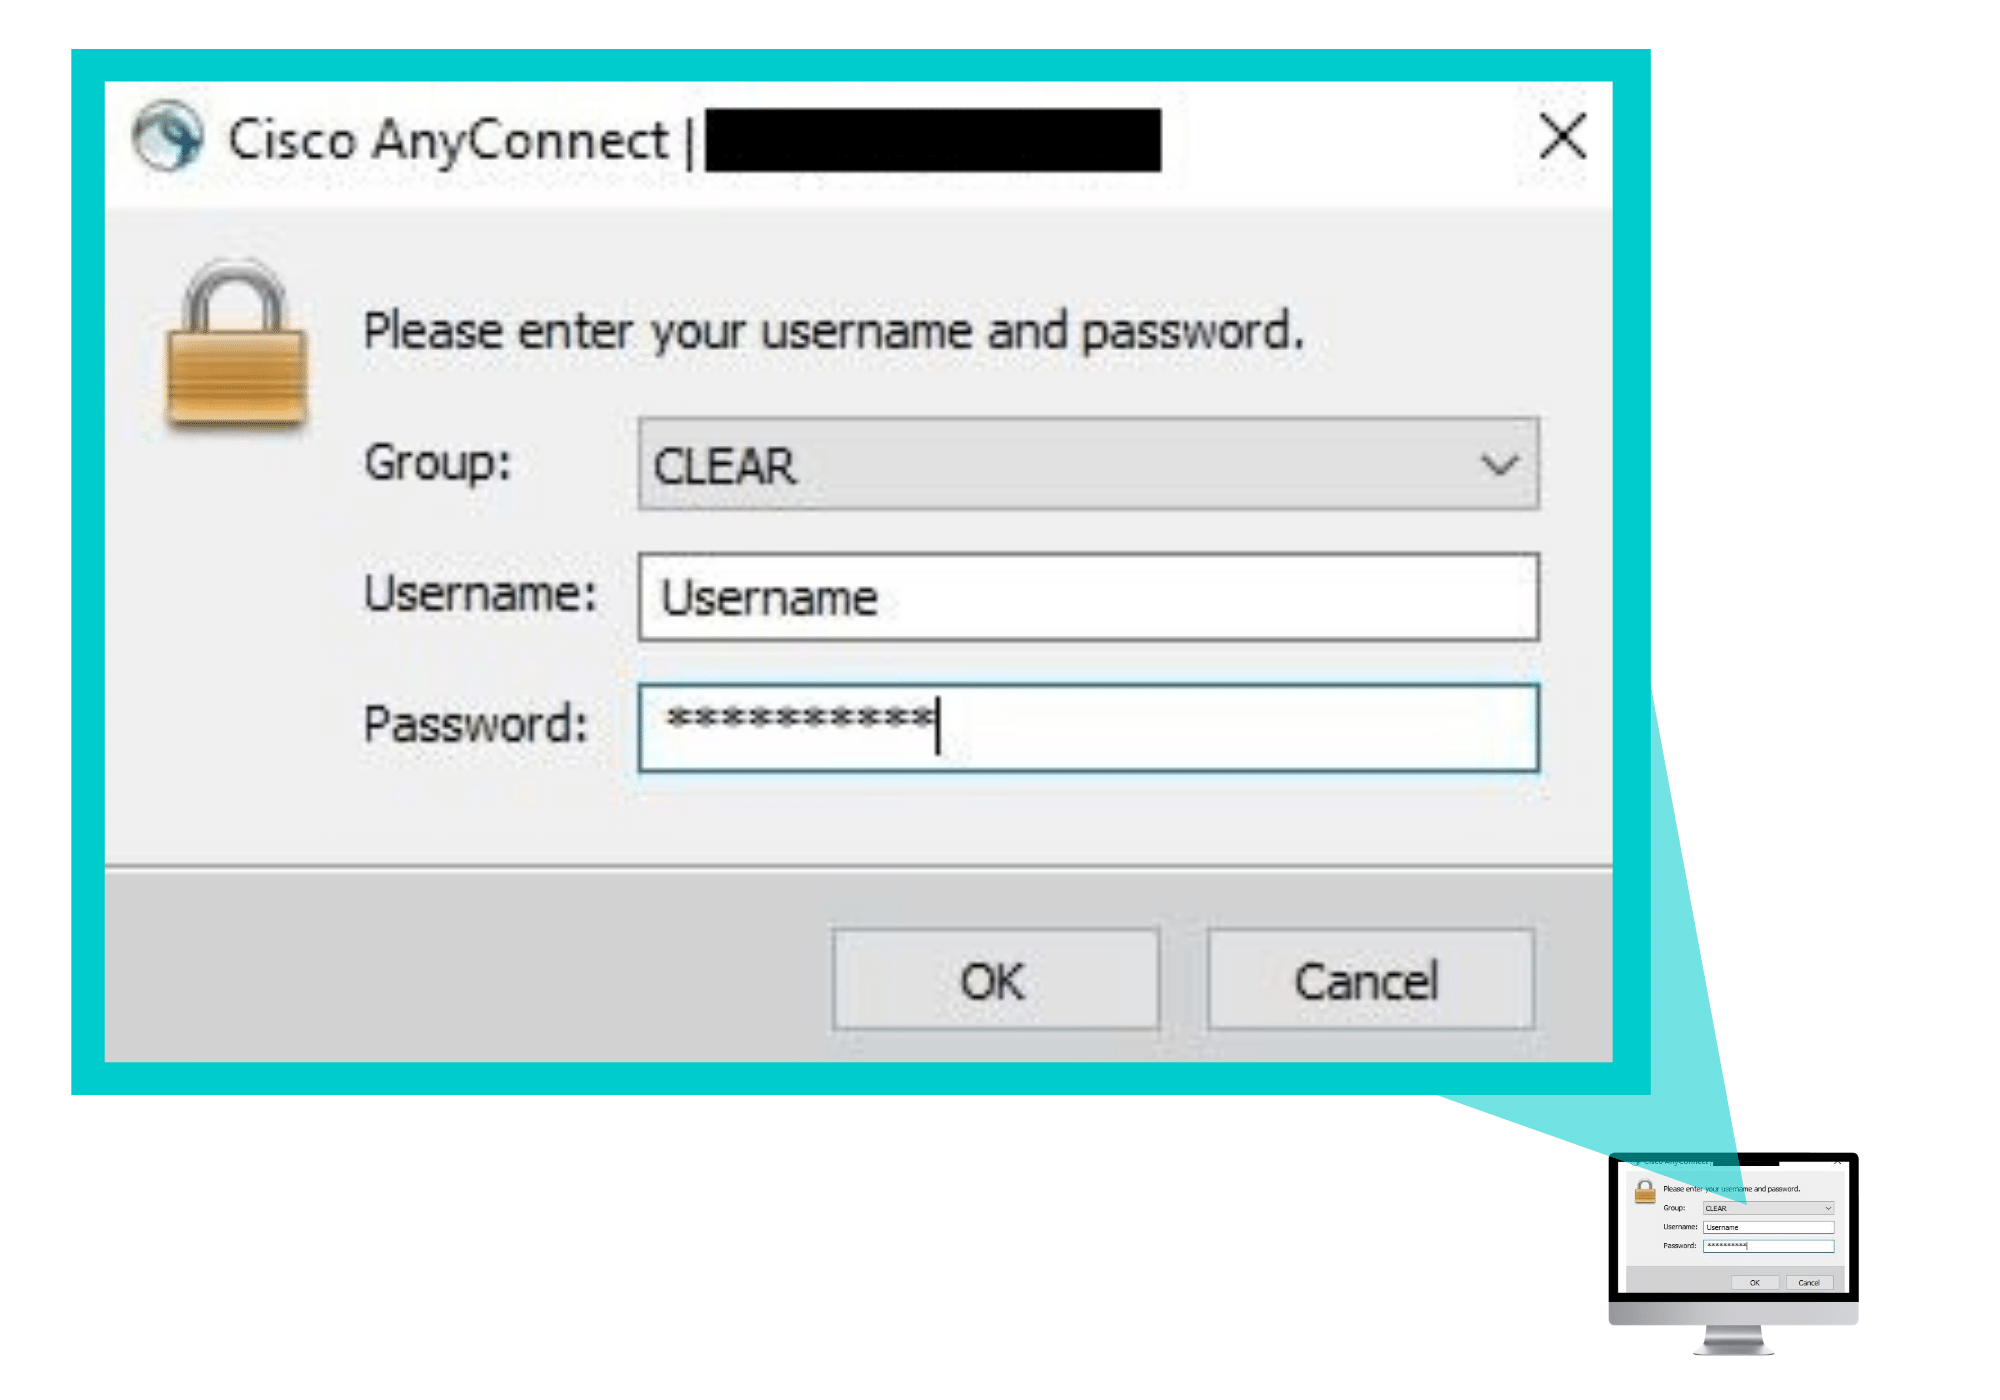
Providing VPN Credentials for 2FA Using OTP
For successful VPN authentication when using the Portnox CLEAR RADIUS with 2FA and OTP, users are required to provide their Token (OTP) that is generated by AgentP + username + password, in the following format:
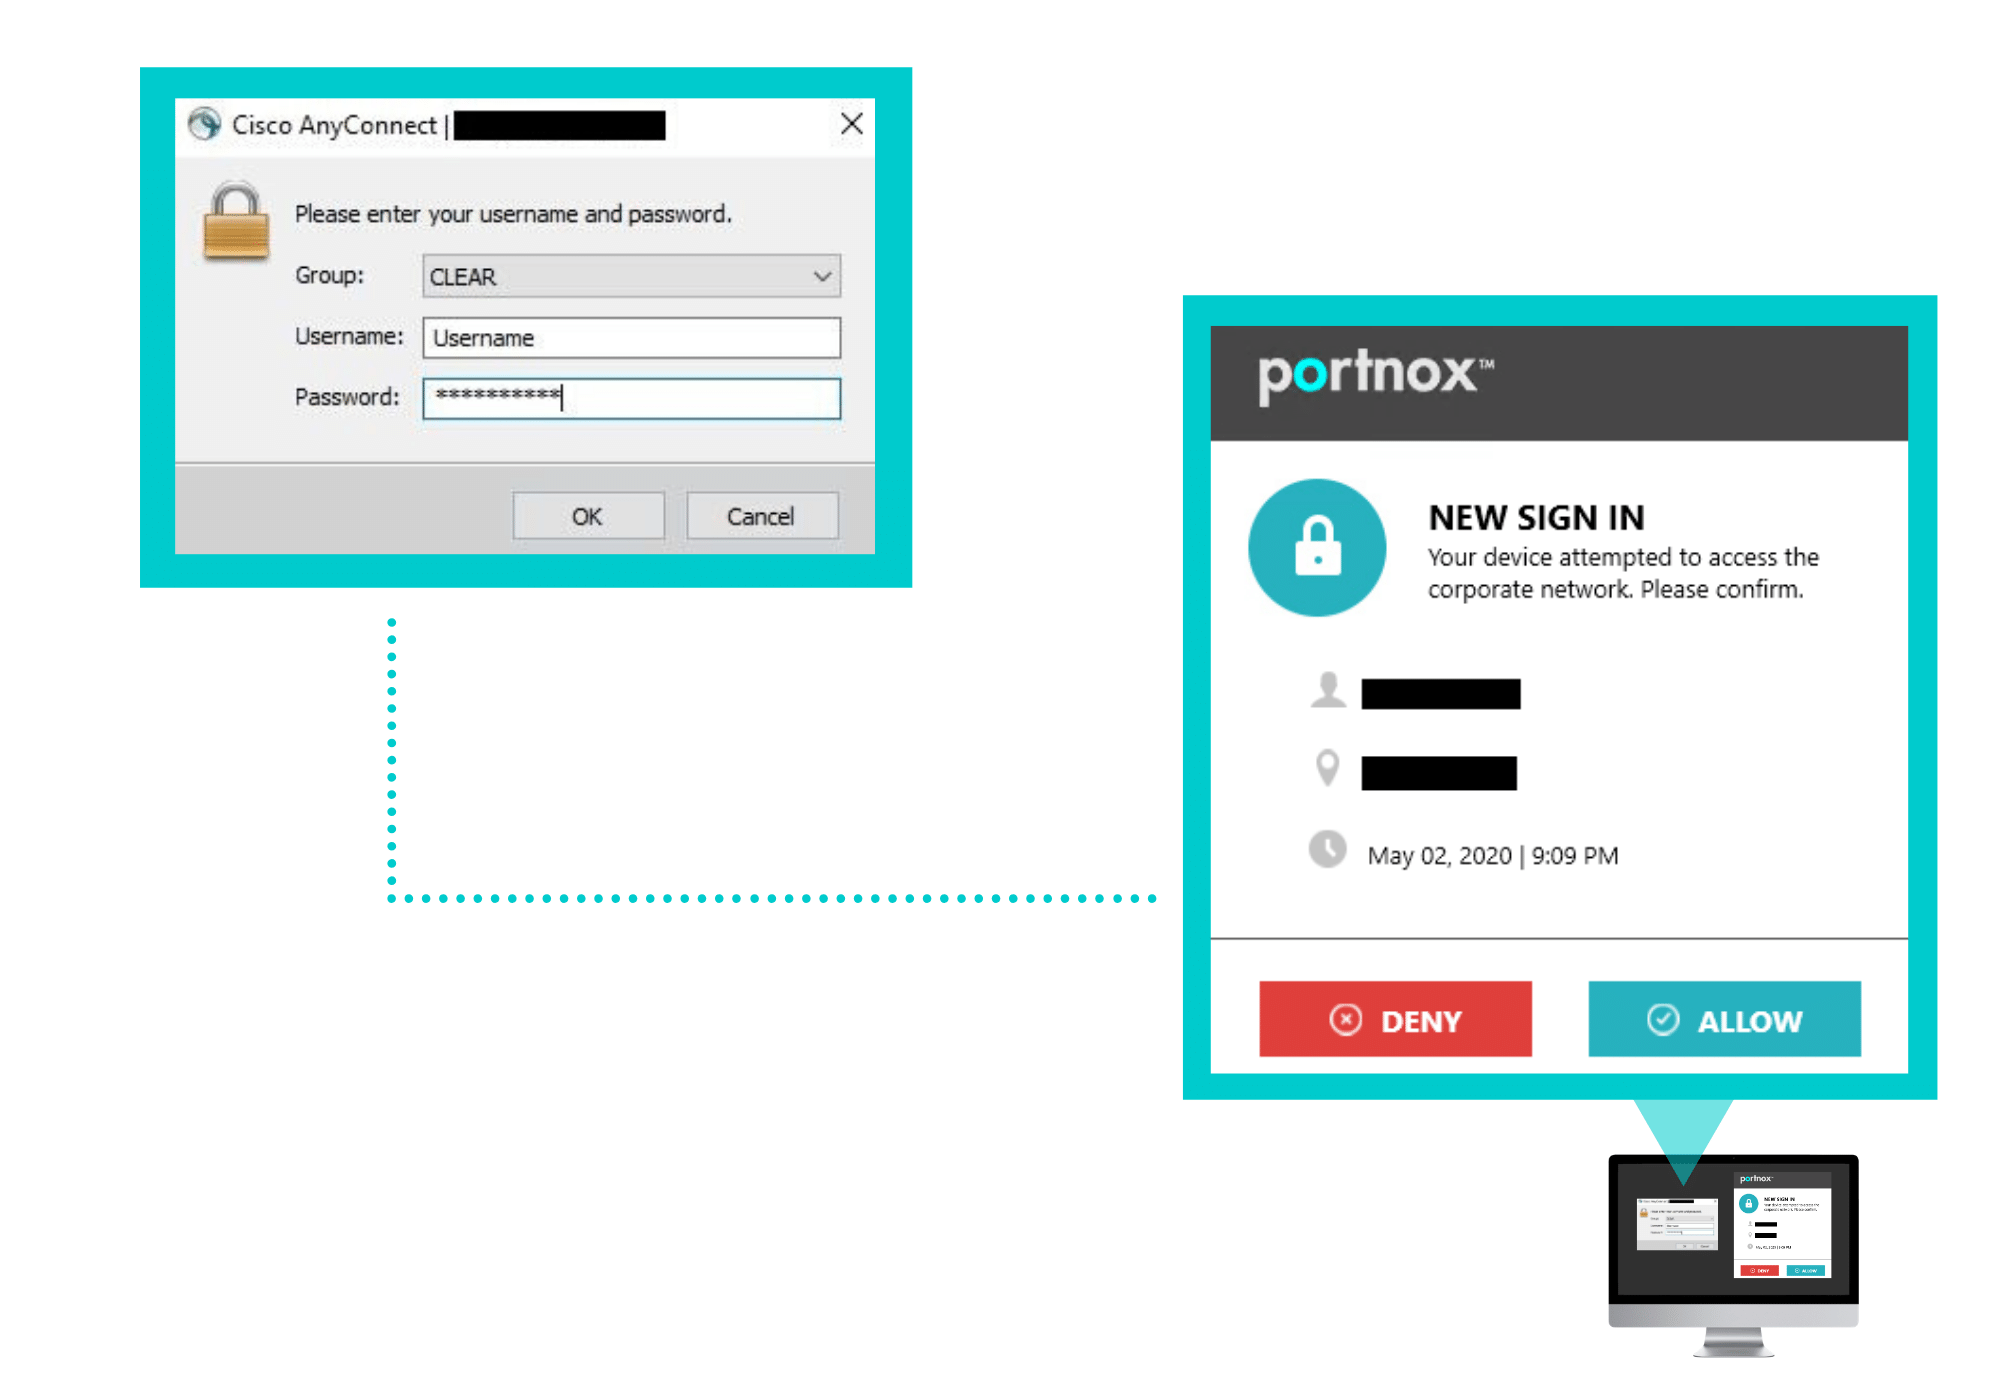
Providing VPN Credentials for 2FA Using Push-To-Access
For successful VPN authentication using Portnox CLEAR RADIUS and 2FA using Push-To-Access, users are required to provide their username + password, which follow with push notification needs to be accepted.
Providing VPN Credentials for 2FA Using Portnox AgentP
For successful VPN authentication using Portnox CLEAR RADIUS and 2FA with Portnox AgentP, users are required to provide their username + password. These will be verified with the specific AgentP on the device requesting access, to confirm that the device is the one it claims to be:
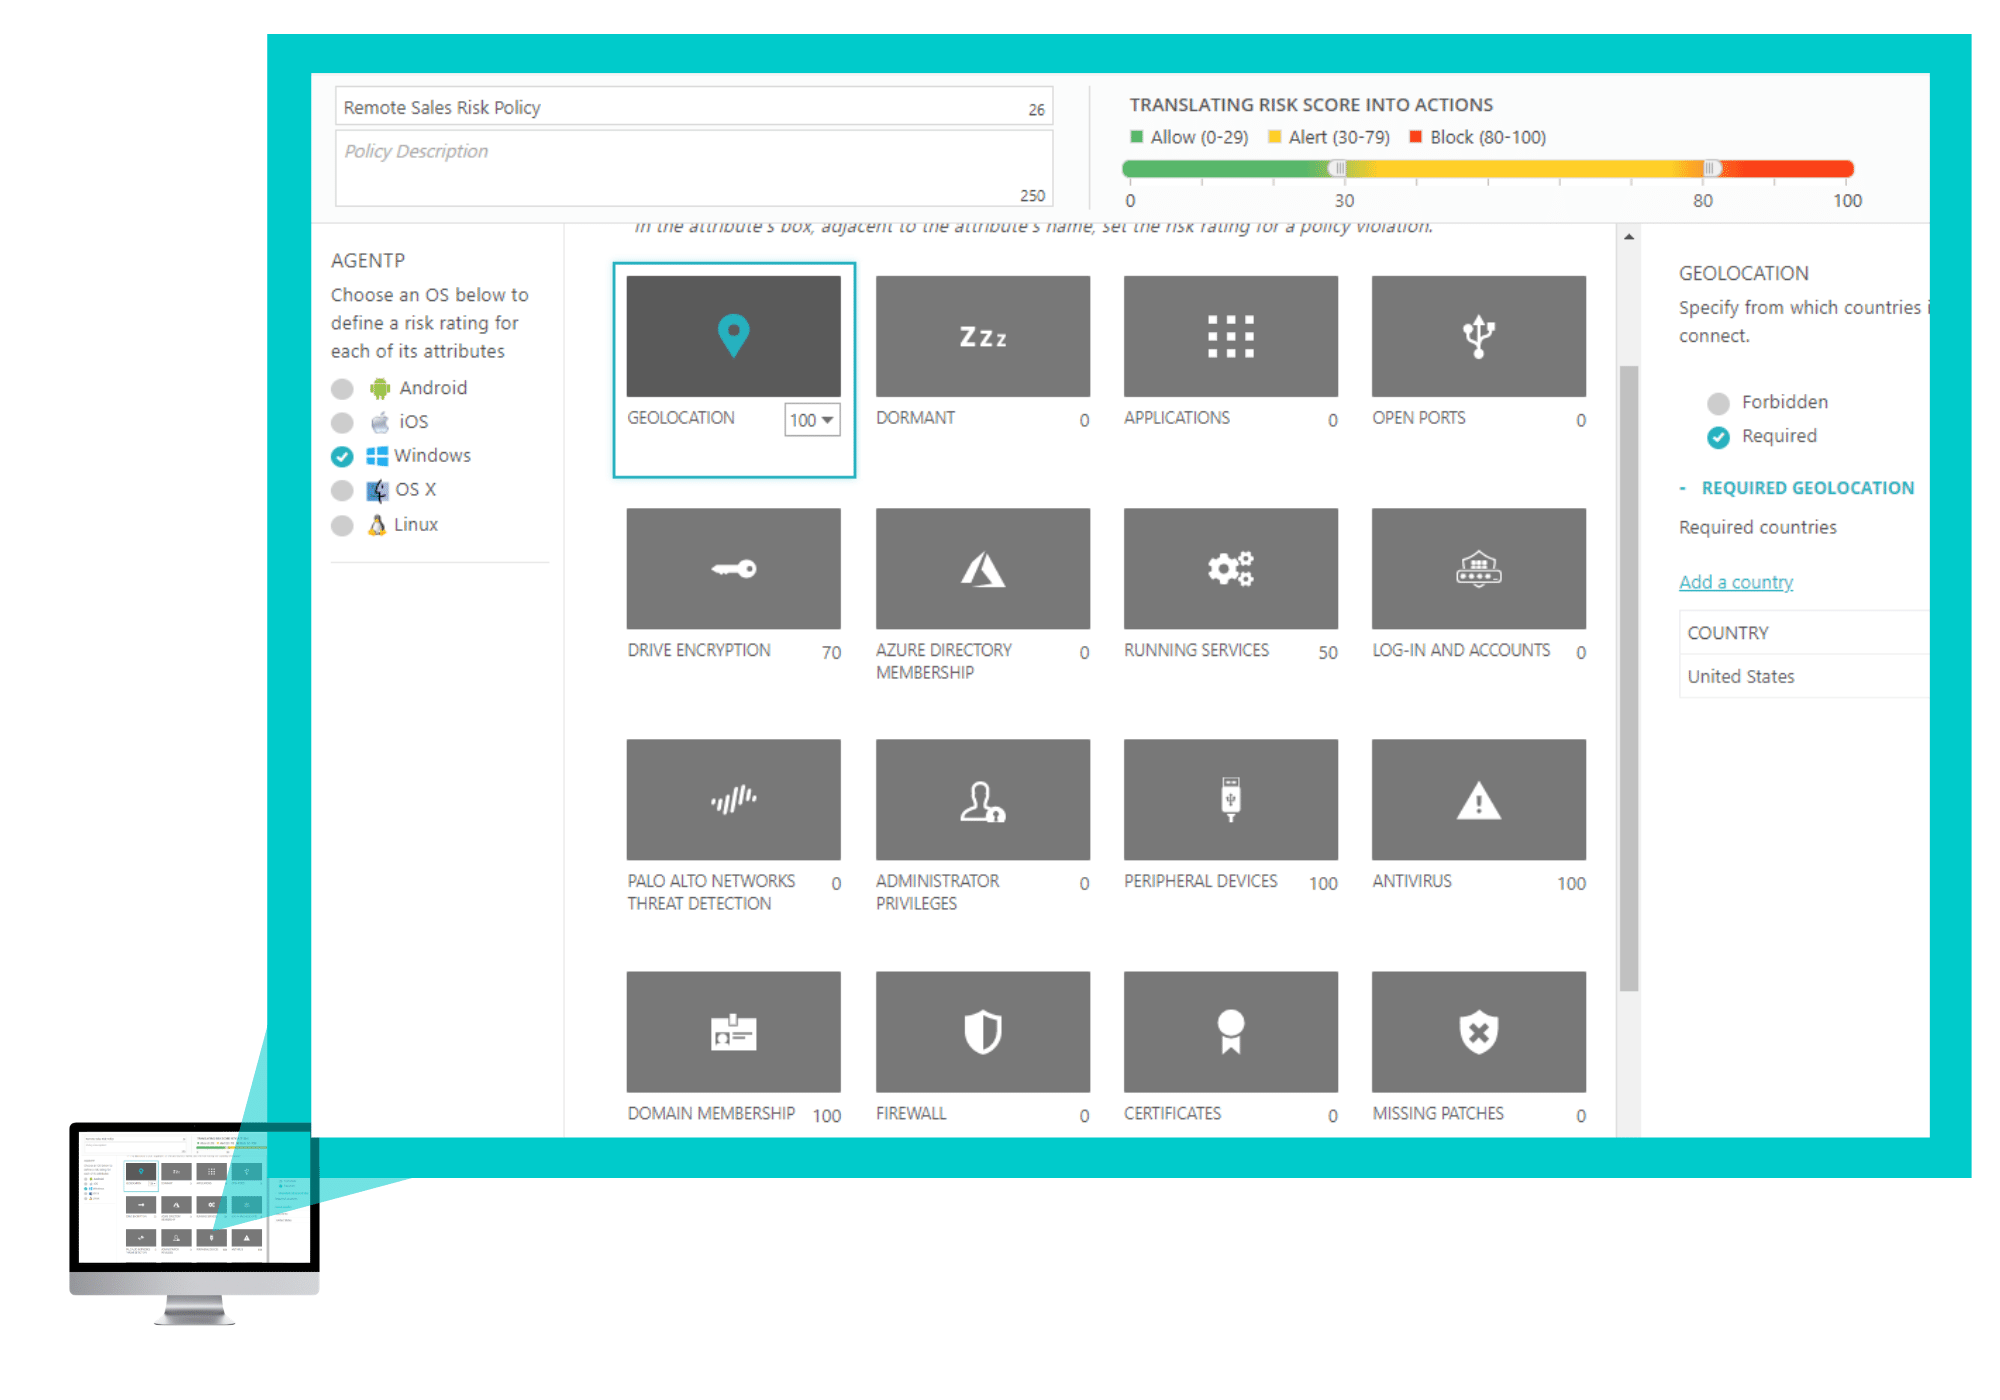
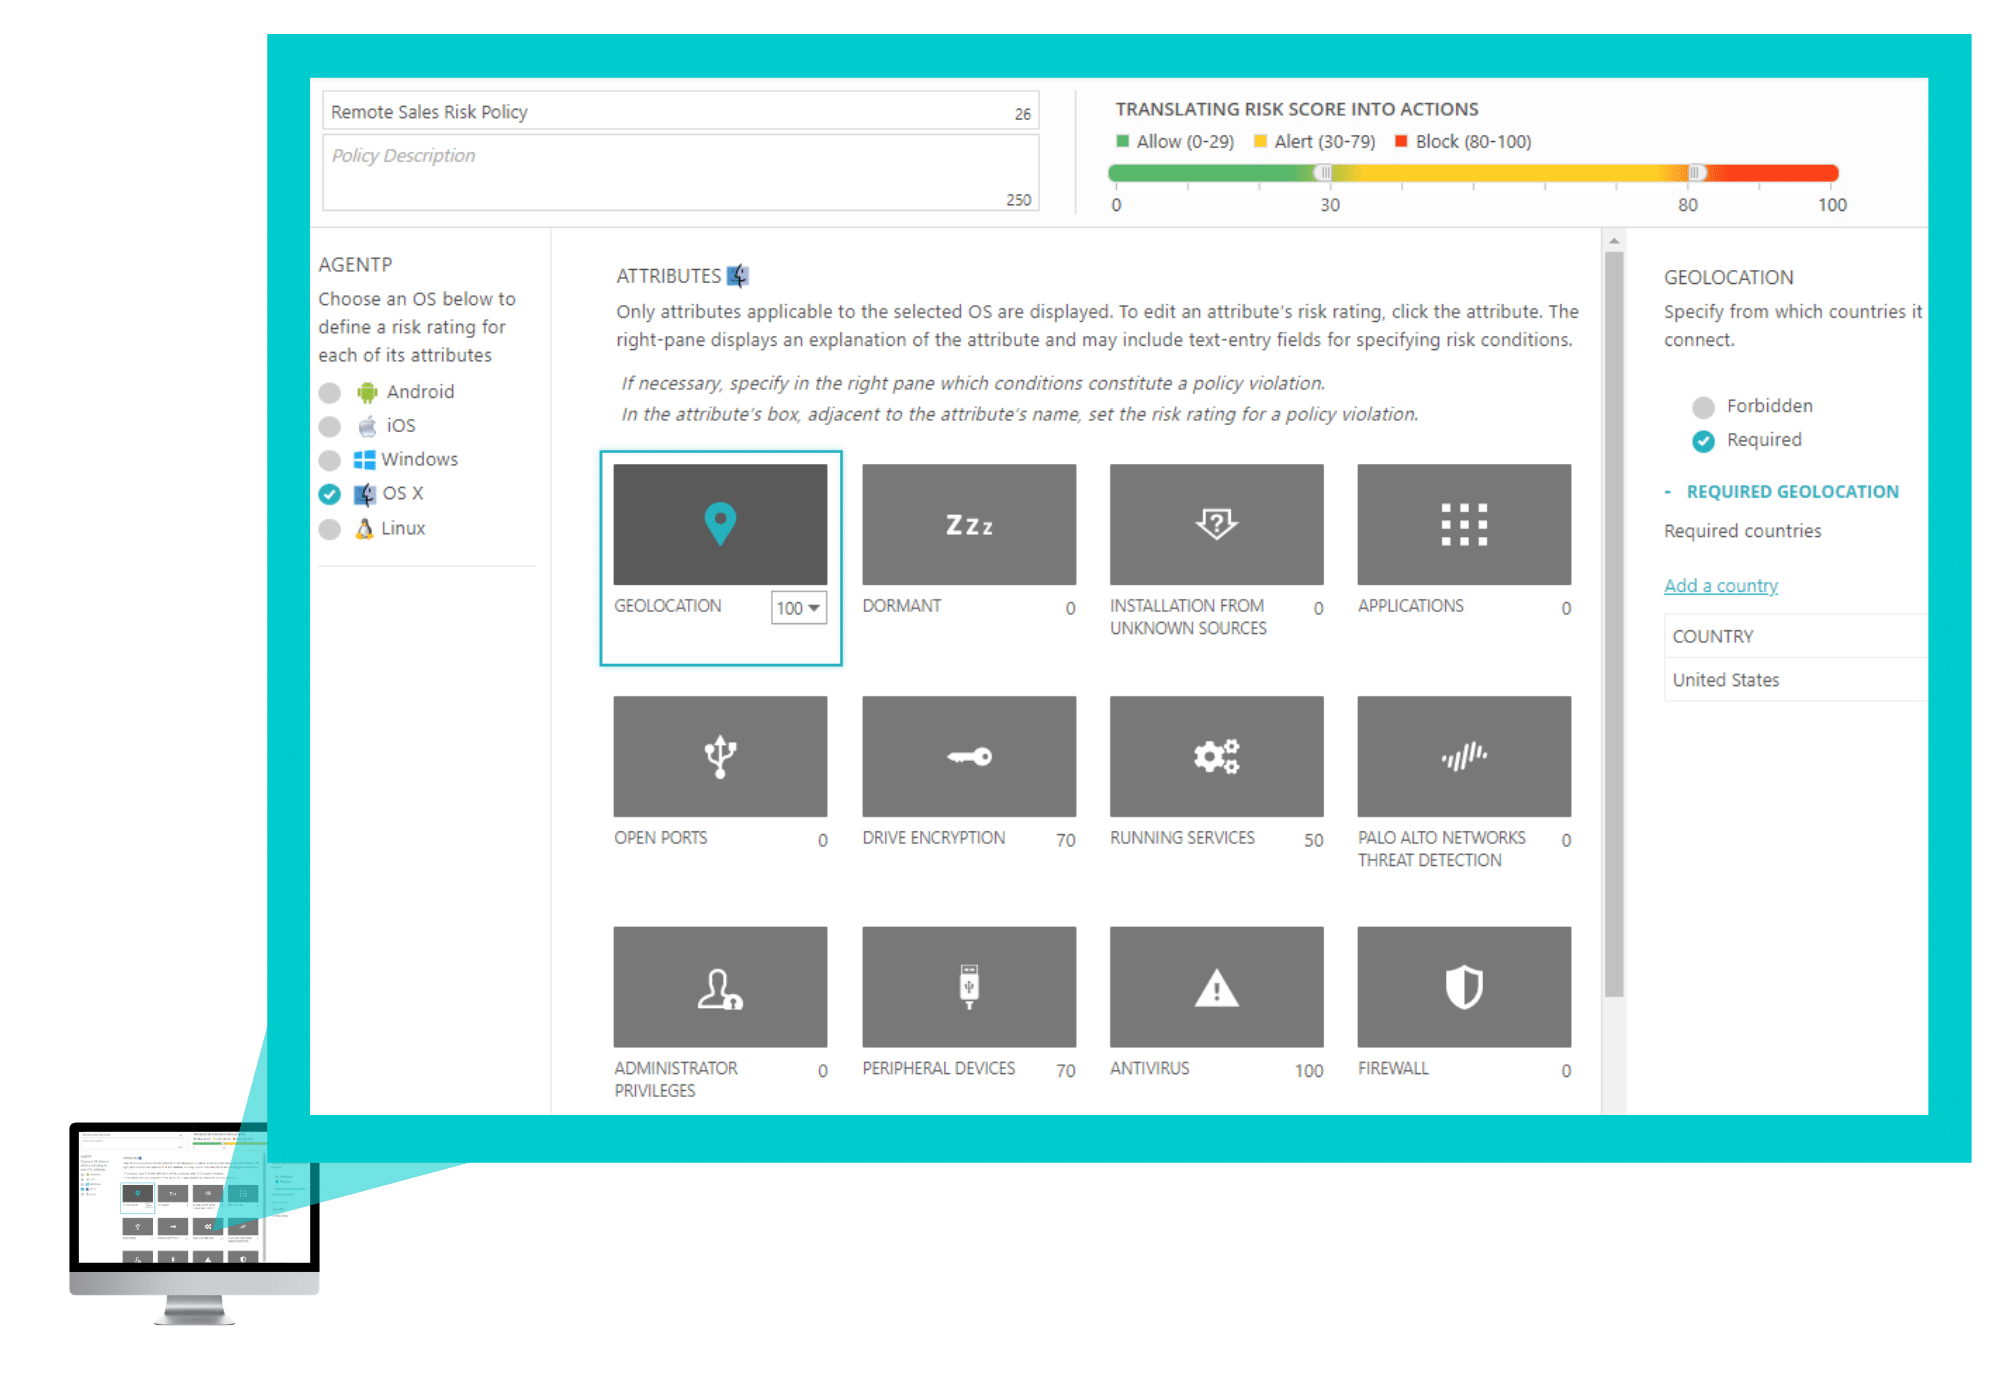
Risk Assessment Policy
The last step is to add the security risk assessment policy for the VPN connection on CLEAR > Policies > Risk Assessment Policies for Windows, MAC OS X, Linux, iOS and Android.
 And now, you can try the full version of CLEAR free for three months. Start here. It’s easy and fast.